This is delicious over pasta.
8 tablespoons butter
12 sage leaves
In a large saute pan, melt the remaining 8 tablespoons of butter. Add the sage to the butter and continue to cook until the butter starts to brown. Remove from the heat.
From: thefoodnetwork.com
Sunday, June 6, 2010
Spicy Bok Choy with Sesame Noodles
Serves 4
1 package fresh sesame or garlic-flavored linguine
1 tablespoon peanut oil
1 tablespoon sesame oil
1 tablespoon minced ginger
2 teaspoons minced garlic
½ teaspoon hot red pepper flakes
4 heads baby bok choy, bottoms trimmed, heads cut in half lengthwise
8-12 brown mushrooms, sliced thickly, or one yellow pepper, cut into chunks
1 cup sake or vegetable stock
2 tablespoons soy sauce
Boil noodles in lots of salted water until barely tender. Drain and keep warm. Meanwhile, heat a wok or very large, heavy skillet over highest flame. Add oils, swirl the pan to coat its bottom, and add the ginger, garlic, and hot pepper flakes (keep your face away from the steam—it is spicy). Stir-fry for 30 seconds or less, then add the bok choy and mushrooms/sweet pepper, and continue to stir-fry for 2-3 minutes. Add the sake or stock and soy sauce, cover the wok, and let steam until everything is tender, 5-8 more minutes. Add the sake or stock and soy sauce, cover the wok, and let steam until everything is tender, 5-8 more minutes. Divide the noodles among 4 soups bowls. Portion the bok choy mixture over the noodles. Serve immediately.
From: Madison Area Community Supported Agriculture Coalition, From Asparagus to Zucchini
Bean and Kale Minestra
Serves 6 to 8
½ pound kale (about 4 cups chopped)
4 large garlic cloves, minced or pressed
1 tablespoon olive oil
6 cups cooked cannellini (white kidney) or cranberry beans- or 2 cups dried beans, cooked.
4-5 cups bean water, vegetable stock, or water
2 heaping tablespoons tomato paste
6 fresh sage leaves
1 teaspoon salt
Freshly ground black pepper
½ cup finely ground cornmeal
2 tablespoons fresh lemon juice
Freshly grated parmesan cheese
Remove kale stems and coarsely chop the leaves. Soak the leaves in a bowl of cold water while you prepare the soup.
In a soup pot, sauté the garlic in the olive oil for half a minute. Add about halt of the cooked beans and part of the water or stock to the pot. Puree the rest of the beans and stock in a food processor or blender along with the tomato paste and sage. Stir the pureed beans into the soup. Add salt and pepper to taste.
Drain the kale. Mix it into the soup and simmer for at least half an hour, until tender.
Mix the cornmeal with the lemon juice and enough water to make one cup. Pour this paste slowly into the simmering soup while stirring constantly to prevent lumps from forming. Simmer the soup for another 10 to 15 minutes, stirring occasionally. Taste for salt and pepper and adjust seasonings. Serve immediately, topped with freshly grated parmesan cheese.
From: Sundays at Moosewood Restaurant
Quiche with Kale and Lavender
Thanks to shareholder Anna for this recipe! From Chowhound.com
9-inch pastry shell (needs to be extra deep)
3 tbsp butter
1 small onion, sliced thin
1/2 tbsp finely chopped rosemary leaves
1/2 tbsp finely chopped lavender leaves
1 small bunch kale, stems removed (we used about 1/2 lb red)
3 eggs
1 cup half-and-half
1 1/2 - 2 cups shredded hard cheese (we used an artisanal similar to Gruyère)
3/4 cup crumbled goat cheese (we used Chabis Feuille)
Blanch the kale about 2 minutes in salted water. Drain, chop, and press out excess water.
Saute the onions in butter. When slightly caramelized, add the herbs, kale, and salt and pepper to taste (remember the cheese and custard will add more salt!).
Distribute about half the shredded hard cheese on the bottom of the crust.
Layer the kale mixture and goat cheese into the crust next.
Top with the remaining shredded hard cheese.
Whisk together the eggs, half-and-half, salt, and pepper to make the custard, then pour evenly over the quiche.
Bake for 35 minutes at 350 degrees, or until a knife inserted at center comes out clean.
Radishes with Scallions
2 Servings
1 bunch radishes, cut into halves or quarters if large
½ tablespoon butter
1 bunch scallions, white part and one inch green, cut into ½ inch pieces
¼ cup chicken or vegetable stock
Melt butter in skillet over medium heat. Add scallions and cook, stirring, until softened, about 2 or 3 minutes. Add radishes and stock. Cover the pan and simmer until the radishes are tender, 3 or 4 minutes. Uncover, increase the heat to medium-high, and boil rapidly to reduce the pan juices while shaking the pan back and forth a few times. Season with salt to taste.
From: Joy of Cooking
CARAMELIZED APPLES AND TURNIPS
Adapted from Chefs A’Field/Chef Anne Quatrano
2 T. butter
2 lbs. turnips, thinly sliced
1 large Honeycrisp (or similar) apple, peeled and thinly sliced
1 t. maple syrup
1 t. sugar
1/2 c. vegetable stock
1 t. butter
Salt and pepper to taste
Heat 2 tablespoons of butter in a large skillet until very hot. Add the turnips and apples and cook until golden, tossing to brown on all sides. Add maple syrup, stir quickly and sprinkle with sugar. Add the stock and simmer for five minutes, covered. Stir in remaining teaspoon of butter and season with salt and pepper. Serve immediately garnished with a fresh herb sprig.
(serves 2-3 as a side dish)
From: www.straightfromthefarm.net
Spring Foraging
By Nicole Sugerman
A foraging how-to might seem a little off-base in this newsletter, because foraging is not farming. However, I think it is wholly relevant. For me, being a small-scale farmer is entirely based around the belief that me, my community, and my world will be healthier and happier if and when we create a local food system based around self-determination and community autonomy. Fostering community self-sufficiency with regard to our food supply involves not only actively growing as much food locally as possible, but learning to eat and use the plants that already grow around us. So, I have compiled an incomplete list of some of the wild foods I am foraging at this time of the year.
Mulberries
I forage for mulberries by looking at the sidewalk. A good tree will have ripe, dark, big berries staining the ground; some drop their fruit prematurely, and some have small, poorly defined berries. The other key to mulberry success is finding a tree with branches low enough to reach! I just scout for a while—there are enough mulberry trees around that one is sure to fine some that are reachable.
While the mulberry is not the most flavorful or sweetest berry, it can be a delicious addition to pancakes, muffins, or over ice cream. Here is a recipe for my favorite thing to do with mulberries:
Mulberry Pie
3 cups mulberries
1 cup sugar
1/4 cup all-purpose flour
1 recipe pastry for a 9 inch double crust pie
2 tablespoons butter
1 tablespoon milk
-Preheat oven to 400 degrees F (200 degrees C).
-In a large bowl, mix berries with sugar and flour. Place mixture into bottom pie crust. Dot with butter and then cover with top pie crust. -Crimp edges, cut slits in upper crust, and brush with milk. Let pie rest in refrigerator for 30 minutes.
-Bake pie in preheated oven for 15 minutes. Lower oven temperature to 350 degrees F (175 degrees C) and bake for an additional 30 minutes.
-Remove pie from oven and let sit on wire rack until cool.
(from: allrecipes.com)
Stinging Nettles
Stinging nettles are a little difficult to harvest, but are well worth the effort. Highly nutritious, nettles can be eaten as a green vegetable or used medicinally. I even tasted a nettle mead that a homebrewer made last week. Harvest while wearing gloves, because the sting does last a fair while. When cooked or dried, nettles lose their sting.
Nasselsopa, Scandinavian Nettles Soup:
• 10 cups washed nettle leaves
• water to cover
• 3 Tbsp. butter
• 1/4 cup flour
• 1/2 cup finely chopped red onion
• 3 cloves finely chopped garlic
• 1/4 cup chopped chives
• 2 cups chicken or beef stock
• 1 tsp. salt
• 1/2 tsp. white pepper
• 1 tsp. dried thyme
• 1/2 tsp. ground nutmeg
• 2 cups light cream or half-and-half
• 2 hard boiled eggs, chopped or cut into slices, for garnish
Harvest a plastic bag-full of fresh stinging nettle leaves, about 10-12 cups, and wash.
Use slotted spoon to carefully place washed nettle leaves in large saucepan, without touching them. Add water to cover, and bring to a low simmer. Blanch leaves for 10-15 minutes, until tender (Note: they’ll be safe to touch once blanched!)
Place blanched nettles with one cup cooking water into food processor and chop finely (don’t puree them). Discard the rest of the cooking water.
Heat butter and flour together in saucepan over medium-high heat to make a light roux. Lower heat to medium, add chopped red onion, garlic, and chives, and sauté until onion is opaque.
Whisk in stock, salt, white pepper, thyme, and nutmeg, stirring until roux is well-incorporated. Stir in processed nettle mixture, then gradually whisk in light cream or half-and-half. Heat until warmed through, about 10 minutes.
Pour into soup bowls, garnish with chopped or sliced hard-boiled eggs, and serve.
Yield: 4-6 servings.
From: http://scandinavianfood.about.com/od/souprecipes/r/nettlesoup.htm
Nettles Tea:
Soak fresh or dried nettle leaves in boiling water. This tea can be used to treat asthma, allergies, urinary infections, regulating blood sugar, and intestinal problems.
Chicory Root
I have been excited this weekend to see the first chicory blossoms, alerting me to the fact that I should begin to harvest chicory root. Nina and I first made chicory coffee two years ago together, and the result was delicious. Chicory has long been an additive to coffee to ‘stretch’ the coffee in lean times, but is also delicious on its own. You can harvest your own chicory roots by digging up the flowers that grow by virtually every roadside (be sure to watch for soil contaminants!) It is a deep blue flower that grows on a long, dark green stalk.
Chicory coffee:
Wash the roots and cut into thin discs. Place in a 300 degree oven and roast until completely dry. Roots will have an aroma of chocolate. Grind in your coffee grinder, and drink mixed with coffee, alone, or in herbal mixes.
Pre-season Highlights
By Nicole Sugerman
Even though the CSA has just begun, we have been farming for quite a while; we started full-time outdoors in March, but started our first seeds in January. A lot has already happened out on the farm! I thought I would detail a few of the production trials and tribulations of this season so far:
The weather: So far, things in the weather department are looking much better than last season. While our bok choy and mustard greens are bolting early, the heat is good for the majority of our crops, with tomatoes looking perky and healthy and summer squash blooming already. Last year was uncharacteristically wet and cool, leading to slow growth and disease problems.
The bugs: Every year brings new and unique challenges, which is why we grow a large diversity of crops, to make sure some succeed even as others struggle. This year, our crops in the chenopodiacae family are battling an infestation of leaf miners. Unfortunately, this family includes some very popular crops, including beets and chard. Although we are helping them through this battle, this is why we don’t have chard yet in the share, and beets too may come in a week or two later than we expected.
The weeds: We have had both successes and challenges so far in our dealings with weeds. As some of you know, having started a farm in a field of turf grass has meant some pernicious and determined weeds. We cover cropped all of our beds this past winter, meaning some of the early weed growth was shaded out in the spring. We are also growing more in black plastic, which is good for the weed issue, because very few weeds can grow through black plastic (although a few can!), but also undesirable, because black plastic is made from petroleum and must be discarded after one season of use. Our onions are looking great; our turnips are still in a virtual field of grass. Still, the weeds will diminish each year as we continue to stay on top of them.
PEA SHOOTS WITH BLACK MUSHROOMS
• 8 dried black mushrooms, soaked in hot water until soft and then sliced
• 2 cups water
• 1 tbsp soy sauce
• 1 tsp sugar
• 1 tsp cornstarch blended with 1 tbsp water
• 1 tsp sesame oil
• 2 tbsp oil
• 300 grams of pea shoots
• ¼ cup chicken stock
• 1 tbsp rice wine or sake
1. Place the mushrooms, water, soy sauce and sugar in a pan. Bring to boil, cove rand simmer until the mushrooms become tender.
2. Add the cornstarch/water blend to the mushrooms, stirring constantly over low heat until the mixture thickens and clears. Sprinkle with sesame oil. Keep warm.
3. Heat the oil in a wok and add the pea shoots. Stir-fry for a few seconds, pour in the chicken stock and rice wine and simmer until tender.
4. Serve the pea shoots on a plate with the mushrooms on one side.
Source: Suite 101, http://asiancuisine.suite101.com/article.cfm/stir_fried_pea_shoots
MUSTARD GREENS
Feel free to substitute collards, or kale for the mustard greens
• 1/2 cup thinly sliced onions
• 2 cloves garlic, minced
• 1 Tbsp olive oil
• 1 pound mustard greens, washed and torn into large pieces
• 2 to 3 Tbsp chicken broth or vegetable broth (vegetarian option)
• 1/4 teaspoon salt
• 1/4 teaspoon pepper
• 1/4 teaspoon dark sesame oil
1. In a large sauté pan, sauté onions in olive oil over medium heat until the onions begin to brown and caramelize, about 5 to 10 minutes. Add the minced garlic and cook a minute more, until fragrant.
2. Add the mustard greens and broth and cook until the mustard greens are just barely wilted. Toss with sesame oil. Season with salt and pepper.
Serves 4.
Source: Simply Recipes, http://simplyrecipes.com/recipes/mustard_greens/
RAW KALE GREENS
• one bunch of kale
• 1/8 cup extra virgin olive oil
• 1/2 teaspoon sea salt
• 1/2 teaspoon black pepper
• 1 teaspoon red pepper flakes
• 1 clove of garlic finely chopped
• 1/4 cup apple cider vinegar
• 1/4 cup green onion thinly sliced (white parts only)
• 1/4 cup chopped sun-dried tomatoes
Wash the kale thoroughly and chop into small pieces. Put into large bowl and add the olive oil and sea salt. Mix well. I use my hands to toss the greens and squeeze them a little bit as I do to make sure the salt really gets into them to help wilt them a bit.
In a separate bowl mix the red pepper, black pepper, vinegar, garlic, green onions and sun-dried tomatoes. Then dump you kale into the bowl with the marinade. Mix thoroughly making sure all of the kale is coating. Refrigerate over night.
Source: The Art of Balanced Living, http://artofbalancedliving.net/2008/01/03/raw-kale-greens-recipe/
Meet the Farming Team!
Weavers Way has a few different farms around North West Philadelphia. However, we don’t all work at all the farms; we specialize in one location. At Henry Got Crops, Nicole Sugerman and I co-manage the farm. We work year round in every aspect of the farm, from harvesting to planting to administrative tasks to working with the students at Saul. Every year we invite apprentices to work with us on all of the Weavers Way Farm sites. The apprenticeship is an educational, working experience, geared towards people who want to learn more about farming through hands-on experience. Nicole and I started at Weavers Way as apprentices ourselves. The apprenticeship is April through November and is full time. Apprentices are involved with every aspect of the farm, including production and education. This year we are thrilled to be working with Sarah Garton, the apprentice at Henry Got Crops.
We also consider the students and integral part of the farming team, here at Saul. Students come out to the farm to work with us, weeding, planting and harvesting. It is important to us that the farm not only be a production farm, but also a working, educational farm.
We also have members of Weavers Way Co-op come out to the farm to work with us and complete their working hours if they are enrolled as working members with the store. If you want to fulfill your co-op hours this way, look for our work shifts posted on the electronic work calendar on the store’s website.
As the season progresses, our team will only grow. Half way through the first pick-up week a new intern will join the team, and the first week in June a second will be working with us as well. We’ll introduce them in the newsletter as they arrive. Over the summer we also employ a few Saul students to work with us through the Philadelphia Youth Network.
And last but not least, we recognize that all of you, the shareholders, are members of the farm team as well. We certainly couldn’t do this without you, and through your unique contribution as a shareholder in the farm, you are more than customers- this is your farm as well!
Since Last November
At the end of last season many shareholders asked, “What are you going to do over the winter?” The answer was, “take a little bit of time off, and get ready for next year.” Well, that’s pretty much what we did! Unlike most people in the winter, I was very excited to head north to colder, snowier climates. I grew up in Vermont and was thrilled to spend a relaxing vacation with family, friends, and feet upon feet of fluffy snow. Nicole was a bit more adventurous and traveled to the other side of the world to spend some time in India. Ask her to tell you some stories about farming in India!
While growing slows tremendously in the winter, and farming as we typically think of it ceases, we were still able to grow and sell a small but consistent amount of produce. Along with the other Weavers Way farm, located at Awbury Arboretum, we attended the Head House market on Second and Lombard until December, and sold at the Piazza market in Kensington every other week February through April. We also occasionally sold to Weavers Way Co-op. Harvests were taken from the hoop house at Saul, as well a few hoop houses and a greenhouse at the Awbury farm site.
Most of the planning for the upcoming season happens in our “office” (which is a living room) on our computers. While planning for the upcoming season is necessary and time consuming, it doesn’t bring in any immediate income, so one day a week we each worked a second job. I did deliveries for the produce department at Weavers Way and Nicole worked for Penn State Extension. The main jobs that we need to complete every winter are:
Seed Order- One of the most exciting tasks of the winter is to browse through seed catalogues and pick new varieties of vegetables to grow. As the weather dips below freezing, pictures of beautiful vegetables and tantalizing descriptions keep us dreaming about the season to come.
Work Schedule- We make a master calendar and plan out what needs to be planted when, for every vegetable, for the entire season, for every week. We look at last year’s schedule, make changes regarding what we think should be planted earlier or later and adjust for new crops that need to be added to the schedule.
Crop Information Data Base- This is our database of planting information. We have a massive spread sheet that includes every vegetable we plant and specific information for each one. This includes how much we want to harvest for each shareholder, how many we need to plant, how many times we plant it during the season, what the spacing is of the plants in the field, how many feet we need to allocate for each crop, and how many flats we need to seed in the greenhouse. Each winter this needs to be updated as the number of shareholders increases, and we review feedback from shareholders about what crops were more or less popular.
Applications for Apprentices and Interns- Urban farming is growing in popularity faster than ever. We had dozens of applicants for our apprentice and intern positions this year. Reading resumes, calling references and conducting interviews in order to find the right fit is a lengthy process that starts even before the previous season ends!
Crop Map – We practice crop rotation, which means every year we move the location we plant our vegetables around the field. This is important for nutrient balance, weed management and pest control. Figuring out where everything will go (and how to fit it all in!) is a complex jig saw puzzle to say the least!
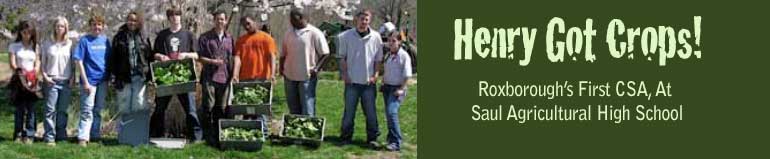
Welcome to the Henry Got Crops! CSA 2010
By Nina Berryman
This is the week we have all been waiting for! Since the close of the CSA season last year, we’ve been working hard to get ready for the 2010 season. One of the aspects about farming which I love most is the constant learning process that happens by necessity. Given the variability of the weather, no two seasons are the same. Given how many different ways there are to do the same task, there is always a new method to experiment with in an attempt to make systems more efficient on the farm. I’m excited to see how this season unfolds!
So what is new this year? We have expanded from 55 shareholders to 80 shareholders. These numbers represent large share equivalents, meaning we’ll count a small share a ½. Because small shares are so popular this means we actually have about 130 individual families eating off of the farm (and that’s not including shares that are being split by multiple families). This year we have also expanded our working share option, meaning a crew of people will be exchanging work on the farm for a lower priced share. You’ll see most of these people helping out with the pick-ups on Tuesdays and Fridays.
To accommodate our larger shareholder population, we are growing on a bit more land. We are not leasing more land, instead we are utilizing the land within the space we used last year more effectively. More beds will be in production this year and a few or our pathways are smaller so we can grow more food. We have two new growing structures on the farm this year which will greatly increase our ability to grow earlier and later into the season. They are the hoop houses which are located on the left hand side of the field. In the first, larger one, we have early season tomatoes planted. The second one was just finished last week and we hope to put late season crops in there so they can keep growing into the fall when it would otherwise be too cold to be growing out in the field.
Another new structure on the farm is our wash station. Construction for this was started last fall and we are just about to start using it for the first time. Construction was done by volunteers from Friends of the Wissahickon as well as students from the Saul’s AP Environmental Science class. The new wash station is located just behind the old one, next to the side of the white building by the parking lot. This wash station was made from wood that came from wind-fallen trees in the Wissahickon park. It has four wash bins so multiple people can wash at one time and has built-in tubs and spray tables to make washing our vegetables faster and easier!
This year we have expanded the number of classes we are working with at Saul as well. All the classes we worked with last year have returned and three more are joining us in the field once a week to learn hands-on about small-scale, vegetable production. We currently work with the AgroEcology class, AP Environmental Science, Wildlife Biology, two Landscape design classes, a math class, and soon we’ll start working with Plant Science and an Animal Science class that is incorporating urban farming into their curriculum. Also, occasionally the food science class comes out to the farm as well. Last week the food science class prepared all the food for a Future Farmers of America banquet that was held at the school, and they used spinach and lettuce from the farm in their recipes.
An update about changes for the upcoming season would not be complete without mentioning the exciting new vegetables we are trying this year! In the spring we have vitamin green, an Asian green that grows quickly and can tolerate colder temperatures. We are also growing dandelion greens to add variety to our selection of cooking greens. We are also planting tomatillos and ground cherries, relatives of the tomato. We will also be planting some scorzonera, a root vegetable that grows similarly to parsnips. Our herb and flower section along the fence line will be expanded, with exciting new additions like sorrel and statice. We have already expanded our perennial section this spring as well. As many of you know, perennials take a while to get established so they may not end up in the share until next year or the year after. In the ground we have sunchokes (also known as Jerusalem artichokes), rhubarb, strawberries, blackberries, raspberries, and blueberries. They should be ready in one or two years.
Subscribe to:
Posts (Atom)