Tuesday, July 24, 2012

Ground Cherry and Cucumber Salsa


½ cup husked and diced ground cherries
1 cup peeled, seeded diced cucumbers
1 sweet pepper, sliced for garnish, the rest diced
¼ cup chopped cilantro
2 garlic cloves diced

Instructions:
Mix all ingredients together in a bowl. You may need to add a little water or vinegar/olive oil to moisten the mixture. Allow to chill for about 25-30 minutes and serve.
Source: http://blog.kitchentherapy.us/2009/08/ground-cherry-salsa/

Ground Cherry Pie


2 ½-3 cups ground cherries
2/3 cup brown sugar
1 tbsp flour
2 tbsp water
3 tbsp sugar
3 tbsp flour
2 ½ tbsp butter

Instructions:
Place ground cherries into an unbaked pie shell. Stir together the brown sugar and the 1 tablespoon of flour-put this evenly over the ground cherries and then sprinkle water-again evenly-over all.
Stir together the 3 tablespoons sugar and the 3 tablespoons flour. Cut in the butter until it is crumbly-Place on top of pie.
Bake in a preheated 425 degree oven for 15 minutes. Then turn down to 375 degrees and bake another 25 to 28 minutes.

Seared Salmon with Tomatillo Coulis


For tomatillo coulis:
1 small red onion
¼ lb fresh tomatillos
1 fresh green Anaheim chile
1 fresh poblano chile
3 unpeeled garlic cloves
2 tbsp olive oil
1 cup cilantro chopped
1 cup fresh spinach leaves
¼ cup extra virgin olive oil
¼ cup water
Four 5 oz pieces of salmon with skin
12 fresh basil leaves
salt and pepper to taste
olive oil
1 tbsp fresh lime juice
Instructions:
Quarter onion. In a shallow baking pan toss onion, tomatillos (in husks), chiles, and garlic cloves with 2 tablespoons olive oil until coated. Roast vegetables in middle of oven until tender, about 25 minutes.
Wearing rubber gloves, peel chiles. Cut off tops of chiles and remove seeds and ribs. Discard husks from tomatillos and peel garlic. In a blender purée roasted vegetables and all remaining coulis ingredients except water, adding just enough water, 1 tablespoon at a time, if necessary to facilitate blending. Season coulis with salt.
With a paring knife make 3 slits in top of each salmon fillet and stuff each with a basil leaf. With a mortar and pestle or an electric coffee/spice grinder coarsely grind peppercorns. Brush salmon with extra-virgin olive oil and sprinkle with ground peppercorns and sea salt. In a large nonstick skillet heat olive oil over high heat until hot but not smoking and sear salmon fillets, turning occasionally, until browned on all sides and just cooked through, about 7 minutes total. Serve salmon with coulis.


Salsa Verde


1 lb tomatillos, husked
½ cup finely chopped onion
1 serrano chile, minced
1 tsp minced garlic
2 tbsp chopped cilantro
1 tbsp chopped oregano
½ tsp cumin
1 ½ tsp salt
2 cups water
Instructions:
1. Place tomatillos, onions, garlic, and chile pepper into a saucepan. Season with cilantro, oregano, cumin and salt. Pour in water. Bring to boil over high heat, then reduce head to medium-low and simmer until the tomatillos are soft, about 10-15 minutes
2. Using a blender, carefully puree the tomatillos and water in batches until smooth.
Source: http://allrecipes.com/recipe/tomatillo-salsa-verde/

U Pick Instructions and Recipes


Two new items are being offered as an option in this week’s U-pick. I’m excited to introduce to you ground cherries and tomatillos! Both are in the tomato family and are rare and tasty treats.
Ground Cherries
Ground cherries are mildly sweet and to me, taste like a cross between a grape and a cherry tomato. They look like a small cherry tomato wrapped in a loose, papery husk. They are called ground cherries because they are harvested from the ground, after they have fallen off the branch of the plant. Look for them on the ground and pick the ones with dried, brown, outer husks. If you peel back the husk slightly, the “cherry” on the inside should be a shiny and somewhat translucent, varying from light green to yellow to tan. Remove the husk and enjoy! I just snack on them as they are, but see the recipe section for suggestions on how to cook with them.
Tomatillos
Tomatillos are slightly tart and to me, taste a bit like a green tomato with a hint of lemon. They look like small tomatoes wrapped in a tight husk. Look for them on the plant, and pick the ones that have grown large enough to fill out or split open their husk. The actual tomatillo will be various shades of green inside the husk. Remove the husk and use in salsa verde or other Central American dishes. See the recipe section for more cooking suggestions. 

Volunteer Day


Last Saturday’s volunteer day was the best turnout we’ve ever had for a volunteer day! Thank you all who participated. I was amazed at how quickly we turned our meadow-engulfed bean beds into an orderly, weed-free haven. Thanks to everyone’s hard work we WILL have edamame in this year’s share! Thanks again to Mary, Robert, Tony, Pete, Anna, Emma, Ralph, Denise, Ning, Carl, Jen and Nancy.

Rain Barrel Workshop


I think the next time we need rain I’ll just schedule a rain barrel workshop, and wait for the rain to follow! After weeks of dry, hot weather, last Thursday’s rain barrel workshop seemed to bring the rain! I would like to say a BIG thank you to Sally McCabe from PHS who ran the workshop. CSA members Sara and Janice enjoyed a hands on, personalized workshop at the farm last Thursday. Many folks told me they were interested but unfortunately couldn’t make it. The city of Philadelphia also holds rain barrel workshops. The next one is July 25th in Kensington. Check out for more details

Roasted Carrots


6-12 carrots
3 tbsp olive oil
1 tsp kosher salt
½ tsp ground pepper
2 tbsp minced dill or parsley

Instructions:
Preheat the oven to 400 degrees F.
If the carrots are thick, cut them in half lengthwise; if not, leave whole. Slice the carrots diagonally in 1 1/2-inch-thick slices. (The carrots will shrink while cooking so make the slices big.) Toss them in a bowl with the olive oil, salt, and pepper. Transfer to a sheet pan in 1 layer and roast in the oven for 20 minutes, until browned and tender.
Toss the carrots with minced dill or parsley, season to taste, and serve.

Sauteed Yellow Squash


2 tbsp butter
½ red bell pepper, chopped
2 yellow squash, sliced
salt and pepper to taste
2 tbsp chopped parsley
2 tbsp chopped scallions

Instructions:
Preheat skillet over medium high heat. Add oil, then butter. When butter melts, add red peppers and squash. Saute 12 to 14 minutes until squash is tender. Add salt, pepper and parsley. Add chives or scallions if you would like a layer of light onion flavor on the dish as well.
Source: http://www.foodnetwork.com/recipes/rachael-ray/sauteed-yellow-squash-recipe/index.html

Quick Pickles


½ c white vinegar
2 tsp sugar
1 tsp mustard seed
salt and pepper to taste
1 clove garlic
4 cucumbers cut into slices

Instructions:
Heat small saucepan over medium high heat. Add vinegar, sugar, mustard seed, salt, and garlic to the pan and cook until it begins to simmer and sugar dissolves. Toss the dill, bay leaf, and sliced cucumbers together in a heat-proof bowl. Pour the simmering liquid over the cucumbers and stir to evenly coat. Allow to cool to room temperature or chill before serving.

Baked Crispy Kale


4 handfuls of kale, torn into bite sized pieces
1-2 tbsp olive oil
sea salt to taste
Instructions:
1. Preheat oven to 350F. Line a baking sheet with parchment paper.
2. Place the kale leaves into a salad spinner and spin all of the water out of the kale. Dump the water and repeat one or two times more just to make sure that the kale is extra dizzy and dry. Use a towel to blot any extra water on the leaves. Place the kale on the baking sheet.
3. Drizzle olive oil over the kale leaves and use your hands to toss and coat the leaves. Bake in the oven for 12-20 minutes until leaves are crisp. Take a peek at the 12 minute mark - the timing all depends on how much olive oil you use. Just use a spatula or tongs to touch the leaves, if they are paper-thin crackly, the kale is done. If the leaves are still a bit soft, leave them in for another 2 minutes. Do not let the leaves turn brown (they'll be burnt and bitter) Remove from oven, sprinkle with salt and serve.

Education Update By: Clare Hyre


This weeks growers market was A LOT OF FUN , but it could be more of a success if ya'll came out an joined us. The next growers market will be August 3rd and Malcom X Park (51st and Pine St., W. Philadelphia) from 3:30 - 6:30. This week Jeffrene, Mikel, and Nathan joined me and sold the Henry Got Crops! produce with pride. 

Student Contributions


Nothing slows down at Saul during the summer! All incoming freshmen are required to attend summer session which is an orientation program to get a taste of what this unique high school is like. We have been enjoying getting to know the new students and introducing them to what happens on a vegetable farm in July. Please enjoy their comments about their first day on the farm!
Stephany Caraballo
My first experience at Henry Got Crops was mulching. I was told that I did a very good job and my teacher was satisfied. I learned and did new things, such as mulching. I never heard of that in my life till Friday. It was fun but it was also tiring at the same time. I learned that mulching helps to control weeds without using pesticides or other chemicals. I thought working/learning about plants was going to be boring, and I also thought it was an easy job because I never worked on it before. But, now I know not to "judge a book by its cover". I take back what I said about plants. I am actually interested in plants now after this wonderful experience I had at Saul High School. I have to admit that I was surprised on how hard I was working. I certainly worked up a sweat! I was also surprised at how beautiful and fast the crops grow. 
Tiarra Burnett
Today in school over in the Henry Got Crops! garden I learned that weeding in the garden is very important. If the weeds grow too tall you will have to weed them down, so the plants can get solar energy from the sun and help them grow. Also, while I was in the garden I tasted a very interesting vegetable that I usually don't eat very often. The vegetable that I tasted is basil and it was great. Another thing I learned while working over in Henry Got Crops! is how to cut down weeds, how tall some weeds can grow, how to use certain tools for special areas, and how to deal with the insects that are around us. Working on Henry Got Crops! can be stressful sometimes. Especially the heat and the bugs. I actually didn't expect to sweat so much. Ultimately, I actually enjoyed my experience at Saul High school.
Alexis Calhoun: When I came to Saul as a farmer at Henry Got Crops for the first time I learned a lot. I learned how to use different machinery and also how to weed. I also learned that it isn't as easy as it looks. Things are heavy and certain machines shut off without warning. At first, I thought that weeding and other farm work wouldn't be fun but it turned out to be really fun. Even though the pulling of weeds hurt a lot it was still fun on that very hot Friday. I was surprised that I really wanted to do some of the work that we had to do. I was really surprised because when I saw all that we had to do I was not really sure that I could do it. When I come back in the fall as a freshman I am looking forward to farming again and learning more than I have already learned in this summer session.
Aysha Burgos: I have learned so much these past few days. One thing I learned was that working with plants isn't as easy as it looks. Pulling out weeds manually can be very painful. Using the weed eaters doesn't necessarily make the job easier. When you use the weed eaters you have to make sure you have enough string and fuel. While I was working on the farm in my head I was saying "This is hard but fun work.". Honestly, the different kinds of plants and insects surprised me. It's not every day that beetles, slugs and other insects get on you. I'm looking forward to getting back outside and saving some more plants.
Brenna: Participating in W.B Saul High School Henry got crops was very interesting. I have learned that plants need as much attention and care as humans do. At first I thought that working with plants would be very boring but it turned out to be a great experience. I was truly surprised that I enjoyed it. To see how things affect plants and then to see how other things helped it grow and that it is not as easy to work with plants as you would think. For me it was hard because you had to put a lot of work into it. Seeing all the different types of plants and bugs was cool. Working with all the equipment and realizing how much everything is worth. With Mrs.Mcatamney we talked about many different plants and then we got to try basil. We tried basil with cheese and for me it was not a flavor I enjoyed. I am looking forward to learning more and understanding how they really work thing here at Saul(:

Wednesday, July 11, 2012

Swiss Chard and Scallion Frittata


1 lb swiss chard
¼ cup olive oil
2 garlic cloves
salt and pepper
8 scallions, chopped
8 large eggs, beaten

Instructions:
1.  Heat oven to 350. Remove the leaves from the chard (reserve the ribs and stems for another use). Wash and dry the leaves and cut them into ½-inch-wide strips.
2.  Heat 3 tablespoons oil in a 12-inch ovenproof nonstick skillet over medium-high heat and sauté the garlic until golden-brown. Add the chard and salt and pepper to taste, cover, and cook over medium heat until the chard is wilted, 1 to 2 minutes. Discard the garlic and transfer the chard to a bowl.
3.  Cook off any excess liquid left in the pan, then add the scallions and sauté until wilted, 1 to 2 minutes. Pour off any liquid that has accumulated in the bowl of chard, then add the scallions to the chard. Mix in the ricotta and half of the eggs.
4.  Heat the remaining tablespoon of oil in the skillet over medium heat. Add the remaining eggs and allow to set on the bottom. Add the vegetable mixture, spreading it evenly. Cook, uncovered, over low heat until the frittata browns lightly on the bottom, 3 to 5 minutes.
5.  Transfer the skillet to the oven and cook until the frittata is set but not dry, about 10 minutes. Let cool.
6.  Transfer the frittata to a plate, cover with wax paper, and refrigerate. (The frittata can be made up to a day in advance.) To serve, cut into thin wedges
Source: http://www.fitpregnancy.com/recipe-finder/mom-appetit-recipe/lidia-bastianich-swiss-chard-and-scallion-frittata

Sesame Roasted Beets


2 bunches of beets
3 tbsp sesame oil, divided
1 leek, ends removed and chopped
2 garlic cloves, chopped
2 tbsp soy sauce
salt and pepper to taste
sesame seeds for garnish

Instructions:
Preheat oven to 400 degrees.  Remove the greens from the beets and set aside.  Chop the beets. Toss beets with one tablespoon of sesame oil and lay flat on sheet pan.  Roast for 25 - 30 minutes, turning twice, until beets are tender (but not mushy).
Chop the beet greens.  Add one tablespoon of sesame oil to a pan over medium heat.  Add the leeks and sauté for two minutes.  Add the ginger and garlic and sauté for an additional minute.  Add the the greens and liquid aminos and cook for 15 - 20 minutes, until tender.  Add salt and pepper if desired.
Drizzle beets with remaining tablespoon of sesame oil.  Garnish beets and greens with sesame seeds and serve warm.
Source: http://www.fortheloveoffoodblog.com/2012/01/sesame-roasted-beets-and-greens.html    

Golden Beet Slaw


1/4 cup olive oil
2 tablespoons red-wine vinegar
1 teaspoon orange zest
1 tablespoon orange juice
3/4 teaspoon coarse salt
1/4 teaspoon freshly ground pepper
1 1/2 pounds golden beets, peeled and cut into matchsticks
3 scallions, sliced
1/2 cup chopped fresh cilantro
Instructions:
Whisk together oil, vinegar, zest, orange juice, salt and pepper. Toss with beets, scallions and cilantro.

Rain Barrel Workshop Update!

Rain Barrel Workshop: Learn how to make rain barrels! Come to the farm Thursday, July 19th, 5-8pm for an instructional workshop lead by Sally McCabe from the Pennsylvania Horticultural Society. Sally will show participants how to make a rain barrel and send everyone home with the information they need to make one on their own. There will be a small fee to cover the costs of running the workshop.
Now all we need is some rain…
cost: $15
Participants will also go home with a screw-on spigot to get jump started on making their own barrel!

Education Corner


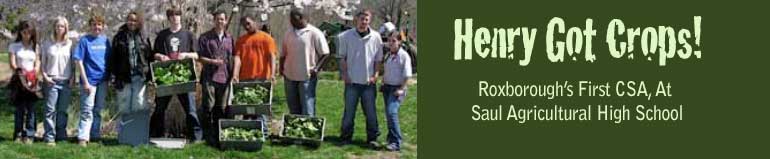
If I could go back in time, I’d want to be a youth summer intern at Henry Got Crops this summer! In addition to working in the field, running the farmstand and helping with the CSA, check out the list of workshops, cooking classes and discussion topics Clare has scheduled for the summer:
make sun tea
Talk about history of CSA and organic food
Make SALAD
Where does your tomato come from? Local food movement
fair trade discussion
Make pickles to take home
food miles workshop
Make popsicles and humus
make  sun tea! 
Harvest and organize for youth growers market
What's in your dorrittos
make your tortilla chips with cucumber salad
Soda game 
Food Cultures 
Beet Popsicles, chips and salsa
make up menus of dishes
pickle okra
Education Corner Update II :
One week of our youth internship program is completed! We have fabulous folks working with us this year so please say hello to our six interns as they work with the farm crew! Also, please come show your support for our interns and other farm education programs at our first Youth Growers Market of the season on Friday from 4 -7pm , location TBD. (I will put something up in the CSA building when I know where it will be). Youth farmers from the Urban Nutrition Initiative, Teens 4 Good, Earth Keepers, and Mill Creek will all be representing their various sites. COME OUT  and SUPPORT FARM EDUCATION!!!!