In 1976 Mildred Council opened Mama Dip’s Kitchen in Chapel Hill with $64: $40 went to food and $24 for making change. At the end of the day, she took home $135 and has been in the restaurant business ever since.
1 1/2 cups all-purpose flour
1 tsp. salt
1/2 tsp. baking soda
3 eggs, beaten
1 cup sugar
1 cup grated green tomato, drained (3 to 4 medium tomatoes)
1 cup vegetable oil
1 tsp. vanilla
1 cup chopped, toasted pecans
1 cup raisins, optional
1. Grease the bottom and 1/2 inch up the sides of a 9x5x3-inch loaf pan; set aside. In a large bowl combine the flour, salt, and baking soda. Make a well in center of flour mixture; set aside.
2. In a medium bowl combine eggs, sugar, grated tomato, oil, and vanilla. Add tomato mixture all at once to flour mixture. Stir just until moistened. Fold in pecans and raisins, if desired. Spoon batter into prepared pan.
3. Bake in a 350 degree oven for 1 hour or until a wooden toothpick inserted near center comes out clean. Cool in pan on a wire rack for 10 minutes. Remove from pan. Cool completely on a wire rack. Wrap and store overnight before slicing. Makes 1 loaf (8 to 10 servings).
This recipe is from Mama Dip’s Family Cookbook, by Mildred Council. Copyright (c) 2005 by Mildred Council. Used by permission of the University of North Carolina Press. www.uncpress.unc.edu
Friday, February 19, 2010
Carrot Cake
From: James Peterson
• Room-temperature butter and flour for preparing pan
• 2/3 cup flour
• 1/2 cup granulated sugar
• 1 teaspoon baking soda
• 3/4 teaspoon baking powder
• 1 teaspoon ground cinnamon
• 1/4 teaspoon ground cloves
• 1/4 teaspoon freshly grated nutmeg
• 1/4 teaspoon ground allspice
• 1/4 teaspoon salt
• 1/3 cup vegetable oil, hazelnut oil, or walnut oil
• 2 eggs
• 1 cup chopped walnuts
• 1/2 cup chopped, drained pineapple
• 1 cup finely grated carrot (from about 1 large carrot)
Cream Cheese Frosting
• One 8-ounce package cream cheese
• 6 tablespoons butter
• 1 teaspoon vanilla extract
• 1 3/4 cups confectioners' sugar
Preheat the oven to 350°F. Butter a 9-by-5-inch or 4 1/2-by-8 1/2-inch loaf pan. Coat the pan with flour, tapping out the excess. In a bowl, whisk together the flour, granulated sugar, baking soda, baking powder, spices, and salt, and then sift them into a second bowl to make sure the spices are well combined. In a small bowl, whisk together the oil and eggs until blended, and then stir the egg mixture into the flour with a rubber spatula. Fold in the walnuts, pineapple, and grated carrot. Transfer the batter to the prepared pan and smooth the top with an offset spatula.
Bake for 50 minutes, or until a toothpick inserted in the center comes out clean. Let cool until easy to handle, and turn out onto a cake rack.
While the cake is cooling, make the frosting. In a bowl, combine the cream cheese, butter, vanilla, and confectioners' sugar. Using a stand mixer fitted with the paddle attachment or a handheld mixer, beat on medium speed until well combined and fluffy, about 10 minutes or until smooth. Spread the frosting on the top of the loaf.
Butternut Squash Galette
From: Gourmet | February 2009
For pastry:
• 1 1/4 cups all-purpose flour
• 1 stick cold unsalted butter, cut into 1/2-inch cubes
• 1 tablespoon chopped sage leaves
• 1/2 teaspoon fine sea salt
• 4 to 6 tablespoons ice-cold water
• 1 large egg, lightly beaten
For filling:
• 1 (2-pound) butternut squash, peeled, seeded, and cut into 2- by 1/4-inch slices (4 cups)
• 1/2 teaspoon fine sea salt
• 3 tablespoons olive oil, divided
• 2 leeks (white and pale green parts only), thinly sliced crosswise
• 6 ounces soft mild goat cheese, crumbled
Make dough:
Pulse flour, butter, sage, and sea salt in a food processor until mixture resembles coarse meal. Drizzle ice water evenly over mixture and pulse until it just forms a ball. (Do not overwork dough, or pastry will be tough.) Gently press dough into a 5-inch disk and chill, wrapped in plastic wrap, until firm, at least 1 hour.
Make filling while dough chills:
Preheat oven to 500°F with rack in middle.
Toss squash with sea salt and 1 Tbsp oil and arrange in 1 layer in a 17-by 12-inch shallow baking pan. Roast, stirring once halfway through roasting, until golden brown on edges and undersides, 20 to 25 minutes. Remove squash from oven and reduce oven temperature to 375°F.
Meanwhile, wash leeks, then cook in remaining 2 tablespoons oil with a pinch of sea salt in a 10-inch heavy skillet over medium heat, partially covered, stirring occasionally, until tender, 10 to 15 minutes. Transfer to a large bowl to cool slightly. Add squash, goat cheese, and 1/4 teaspoon pepper and toss gently.
Make galette:
Roll out dough into a 13-inch round on a lightly floured surface with a lightly floured rolling pin. Transfer to a baking sheet. 3Arrange filling in an even layer in center of dough, leaving a 2- to 3-inch border. Fold dough in on itself to cover outer rim of filling, pleating dough as necessary. Brush pastry with beaten egg and bake galette until crust is cooked through and golden on edges, 35 to 45 minutes. Cool on baking sheet on a rack 10 minutes before serving.
Kohlrabi Soup
600 g (1 1/4 lb) kohlrabi
6 tbsp extra-virgin olive oil
1 white onion, chopped
120 g (4 oz) bacon in one piece
1 carrot, chopped
3 garlic cloves, chopped
2 large potatoes, diced
salt and pepper
1. Peel the kohlrabi and dice. Heat 3 tablespoons of the oil in a saucepan, add the onion and bacon and cook over a low heat for about 3 minutes until translucent, stirring continuously.
2. Add the kohlrabi, carrot, garlic, potatoes and about 2 litres (3 1/2 pints) 8 cups of water and bring to the boil.
3. Cook with the lid on for about 1 hour. Discard the bacon and add salt and pepper to taste. Pour into a soup tureen, add the remaining oil and serve immediately.
Source: www.cookitsimply.com
Plant Profile: Radish
By Nina Berryman
Raphanus sativus is yet another vegetable we grow that belongs to the Brassicaceae family. As with many vegetables, its classification is not simple. The small varieties that you are eating now are part of the Radiculata Group. The Longipinnatus Group includes the long, white daikon varieties that you will see soon, and the Caudatus Group contains a type called Rat Tail that is grown for its seed pods that can grow 12” long and are used in curries and as pickles.
Radishes rarely get the spotlight and are often considered one of the less popular, ordinary vegetables. However, this has not always been the case! In ancient Egypt pictures of radishes were inscribed on pyramid walls. In ancient Greece radishes made of gold were made as offerings to the god Apollo. They are believed to be native to the eastern Mediterranean and have been identified in artwork from 2000 B.C.
Source: Ashworth, Susan, Seed to Seed. Seed Savers Exchange Inc. Iowa. 2002.
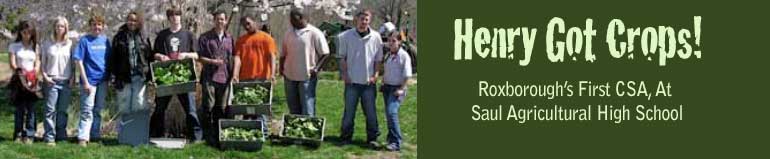
Photo Documentary with Henry Got Crops!
Earlier this summer local photographer Dave Tavani visited our farm as part of his urban farm tour. He is a freelance photographer based in Philadelphia and wanted to document local food production within the city limits. He put together a photo documentary of a handful of farms in Philadelphia, including our very own. The photo collection includes voice recordings and images not only from Henry Got Crops!, but also Weavers Way Farm at Awbury Arboretum, Seeds for Learning Farm at MLK High School, Greens Grow Farm in Kensington, the Wyck historical garden in Germantown and Mill Creek Farm in West Philadelphia.
See the web address below, or search “Dave Tavani” and then click on “Farming the City.” You can then click on the Henry Got Crops chapter. You will even hear some of your fellow shareholders’ voices talking about their experience with the CSA. I encourage you all to check it out! He has done an excellent job of portraying the many different examples of urban agriculture right here in Philadelphia.
http://davetavani.com/Dave_Tavani_Freelance_Photography/Home_-_Dave_Tavani_Freelance_Photography_-_Philadelphia_Photographer.html
Seed Saving
By Nina Berryman
Seed saving is a fascinating, sometimes daunting, and often overlooked part of vegetable production. Most farmers and gardeners leave it up to the professionals, and are content to invest money instead of time and energy to get their supply of next year’s seed. Most of the time, I too fall under that description. While I have limited experience with seed saving, I am quite interested in the techniques, and hope to do more of it in my future. Here is a quick intro to the basics of seed saving to get you started, or at least pique your interest!
Seed saving is the process of saving seed from desirable plants in order to grow them again in following years. Creating new varieties is a different topic; what I’m writing about here is how to preserve existing varieties in your garden. What makes seed saving complicated? The seed you save from a plant will not necessarily produce new plants that look like the plant from which you collected it. Sometimes it does…but often it doesn’t. Therefore, the first step in seed saving is to understand how plants naturally reproduce, so you then know how to interfere to get your desired results. In other words, how do you interfere so that the seed you save DOES look like the plant from which you collected it?
Plants are pollinated three different ways: self pollination, insect pollination, and wind pollination. In order for a flower to be pollinated, pollen must reach the ovary of the plant. On some plants, the pollen and the ovary are part of the same flower (called a perfect flower) and they can self-fertilize on their own (for example beans).Other plants have pollen and ovaries on separate flowers (called imperfect flowers, where one flower is male and one is female). These plants require that either wind (in the case of corn) or insects (in the case of squash) move the pollen from a male flower to a female flower in order for the ovary to be fertilized.
When pollen from one type of plant fertilizes an ovary from another type of plant, you have hybridization. This can occur between different varieties (such as two varieties of peppers) as well as different sub species (such as broccoli and cabbage). Maintaining seed purity is important to ensure that the seed you save looks like the plant from which you are saving it. This is not a concern with plants that only self-fertilize. Plants that are wind pollinated or insect pollinated can be isolated a few different ways. One is by distance. Different plants require different isolation distances. This method can be hard for the backyard gardener who has neighbors in close proximity. Seed purity can also be maintained through time isolation, meaning different varieties are planted at different times in the season such that the time during which they are flowering does not overlap. This can be hard in climates that have short growing seasons. Seed purity of insect-pollinated plants can be maintained through mechanical isolation such as bagging or caging. In these cases you either tie a bag around the flower, or build a screened cage around the plant to prevent insects from cross-pollinating between different plant types. If you bag a flower, you need to then do the work of the insects yourself and hand-pollinate the flowers yourself (sometimes done with a q-tip). If you cage plants, you can introduce the necessary insect pollinators to that cage.
When selecting desirable plants it is important to observe the plant during the entire growing season and take note of different characteristics. Look at all parts of the plant, not just the fruit. Consider earliness, disease resistance, insect resistance, drought resistance, stockiness, uniformity, trueness to type, color, size, productivity, storage ability and of course, flavor. Be sure not to eat all the best looking plants and only leave the weakest ones for seed saving!
Population size is another important consideration for saving seed. The more plants from which you save seed, the greater the genetic diversity of your selection and the more robust your seed bank will be. This is particularly challenging for the backyard gardener who has limited space. The general rule of thumb is in order to have enough genetic diversity in you seeds, you should save seed from at least 20 self-pollinating plants or 100 cross-pollinating plants. Even with a large selection pool, genetic diversity can decline over the course of many years of seed saving from the same gene pool. When this happens new genetic material needs to be introduced to the plant population by planting seeds of the same variety but from a different source, such as a seed catalogue or a neighbor.
The next step in seed saving, after you have collected the seed, is cleaning. There is wet and different plants require different techniques. Wet processing is required for tomatoes. Many plants must first ferment (i.e. rot) so that microorganisms destroy seed-borne diseases. Then seeds should be separated from the pulp. This can be done by repeatedly putting the fermented mixture in water, stirring it, and letting bad seeds and pulp float to the top, and good seeds sink to the bottom. Then the good seeds must be patted dry and fully dried on a non-stick surface, like glass, ceramic or a cookie sheet, not paper, cloth or non-rigid plastic. While drying, do not expose the seeds to temperatures higher than 95 degrees Fahrenheit. Good places for drying include in a cold oven with the pilot light on and the door cracked open, or on top of the refrigerator.
Dry seed processing is used on seeds that have husks or pods. After the seeds have completely dried on the plant, remove the seed heads and crack open the husks or pods. Be sure not to apply so much pressure to the seed heads that you damage the seeds themselves. Winnowing is the process of separating the husks from the seeds, and can be done by pouring the seed mixture from one bucket to another in front of a fan on low. The slight breeze blows the light, unwanted husks away while the heavier, desirable seeds fall safely into the bucket below.
Now that you have your seeds, it is important to store them properly so they last from one year to the next. Heat, light and moisture must be kept to a minimum. Air tight containers such as glass canning jars with rubber seals are ideal. For long-term storage, put seeds in the freezer. Be sure the seeds are completely dry though, otherwise this will damage them.
It is useful to test the germination rate of seeds before planting them to make sure they are still viable and you are not wasting precious garden space. This can be done by placing at least 25 seeds between two moist paper towels, then placing the paper towel in an open plastic bag, so the seeds can breathe but moisture is retained. Place in a warm place and re-spray the paper towel to keep it moist. The area should be kept at a constant temperature, usually around 75 degrees F is best. The top of the refrigerator is usually a good place. Check the seeds daily, and remove sprouted seeds once a week, after counting them. Research the germination length for the seeds you are testing and after that length of time has passed, add up the number of seeds that germinated and divide by the original number of seeds on the paper towel. This will give you your germination rate.
I suggest trying to save seed from these vegetables: beans, peas, spinach, cilantro, fennel, lettuce, okra, tomatoes.
Source: Ashworth, Suzanne. Seed to Seed. Seed Savers Exchange Inc. Iowa. 2002
Fried Green Tomatoes
4 to 6 green tomatoes
salt and pepper
cornmeal
bacon grease or vegetable oil
Slice the tomatoes into 1/4 - 1/2-inch slices. Salt and pepper them to taste. Dip in meal and fry in hot grease or oil about 3 minutes or until golden on bottom. Gently turn and fry the other side.
From: http://southernfood.about.com/od/greentomatoes/r/bl10712a.htm
Green Tomato Pie (savory)
-Using a large pan (11” by 17” works well), roll out a pie crust and line pan.
-Slice 8 to 10 green tomatoes, removing stem end.
-Slice two large onions and sauté with ½ stick sweet butter
-Slice 1 lb. Swiss cheese and 1 lb muenster (although this is also good with other cheeses- try cheddar, goat, whatever)
-Sprinkle pie crust lined pan with bread crumbs. Layer tomato slices, cheeses, and sautéed onions in pan. Sprinkle with coarse salt and fresh ground pepper. Also sprinkle 2 Tb. brown sugar. Repeat layers until ingredients are used up or pie pan is full. Top with more bread crumbs and a sprinkle of wine vinegar.
-Roll out a second pie crust to top pie. Crimp edges and slash center to vent. Bake at 375 until brown. If you wish, you can brush top crust with milk to glaze when it begins to brown.
From The Political Palate by the Bloodroot Collective. An old Pennsylvania Dutch recipe.
Kale and Ricotta Salata Salad
-3/4 to 1 pound lacinato kale (also called Tuscan kale) or tender regular kale, stems and center ribs discarded
-2 tablespoons finely chopped shallot
-1 1/2 tablespoons fresh lemon juice
-1/4 teaspoon salt
-1/4 teaspoon black pepper
-4 1/2 tablespoons extra-virgin olive oil
-2 ounces coarsely grated ricotta salata (1 cup)
Working in batches, cut kale crosswise into very thin slices.
Whisk together shallot, lemon juice, salt, and pepper in a small bowl, then add oil in a slow stream, whisking until combined well.
Toss kale and ricotta salata in a large bowl with enough dressing to coat well, then season with salt and pepper.
www.epicurious.com
Easy Preparation of Winter Squash:
Cut squash in half, scoop out seeds and fiber, then bake in a 350° oven for 45 minutes to an hour, until a knife can be easily inserted near the stem. Roast & eat the seeds like pumpkin seeds. Season squash with butter and salt, or maple syrup and cinnamon.
Other quick ideas:
-Steam cubes of winter squash and then dress with olive oil, tamari, ginger and squash seeds.
-Add squash chunks to a hearty vegetable soup
Other quick ideas:
-Steam cubes of winter squash and then dress with olive oil, tamari, ginger and squash seeds.
-Add squash chunks to a hearty vegetable soup
Green Tomato Pie (sweet)
-Pastry for one all-butter, double-crust pie
- 6 medium green tomatoes
- ¾ cup golden raisins
- 1 ½ tsp grated lemon rind
- 2 Tbsp fresh lemon juice
- 1 Tbsp apple cider vinegar
- 1 ¼ cups granulated sugar
- ¼ cup dark brown sugar
- 4 Tbsp flour
- ½ tsp salt
- 1 tsp cinnamon
- 1 tsp ground ginger
- 2 Tbsp cold unsalted butter, cut into small bits
Preheat oven to 425.
Wash the tomatoes and cut them into 1/8 inch thick slices, discarding stem ends. Put the tomato slices in a large mixing bowl and add the raisins, lemon rind, lemon juice and vinegar. Stir and set aside.
Combine the sugars, flour, salt, and spices in a small bowl. Sprinkle 2 Tbsp of this mixture over the prepared pie crust and toss the rest with the sliced tomatoes. Turn into chilled pie crust. Dot with butter. Top with additional pie dough, making slashes for air vents if a solid crust on top. Or make a lattice top to cover the pie.
Bake pie at 425 for 15 minutes. Then reduce the heat to 325 and bake for another 50 minutes, or until the filling is bubbling and the crust is golden brown.
Let the pie cool completely before cutting.
From: Martha Davis Kipcak, SE Wisconsin Slow Food
Beet and Carrot Pancakes
-1 1/3 cups (packed) coarsely shredded peeled beets (from 2 medium)
-1 cup coarsely shredded peeled carrots (from 2 medium)
-1 cup thinly sliced onion
-1 large egg
-1/2 teaspoon salt
-1/4 teaspoon pepper
-1/4 cup all purpose flour
-3 tablespoons olive oil
-Sour cream
Preheat oven to 300°F. Place baking sheet in oven. Combine beets, carrots and onion in large bowl. Mix in egg, salt and pepper. Add flour; stir to blend well.
Heat 1 1/2 tablespoons oil in heavy large skillet over medium heat. Using 1/3 cup beet mixture for each pancake, drop 4 pancakes into skillet. Flatten each into 3-inch round. Cook until brown and cooked through, about 4 minutes per side. Transfer pancakes to baking sheet in oven; keep warm. Repeat with remaining beet mixture, making 4 more pancakes.
Serve pancakes with sour cream.
(Bon Appetit, March 1998)
Celery Root Remoulade
-1 Celeriac
- 2 eggs + 1 egg yolk
- 1 tbsp. Dijon mustard
- 250 ml (1 cup) oil
- 1 tbsp. vinegar
- Chopped parsley (optional)
- Salt and pepper
Peel and slice the celery root (celeriac) into thin julienne strips;
place into a pot of boiling water and let simmer for a few minutes; drain;
hard boil two eggs; drain; run under cold water; shell the eggs and separate the yolks from the whites;
mash the egg yolks into a paste; add one raw egg yolk;
add 1 tbsp. mustard and slowly whisk in 250 ml (1 cup) oil, as for basic mayonnaise; finish with 1 tbsp. vinegar, a little chopped parsley (optional) and salt and pepper;
mix the sauce together with the celery root; refrigerate at least one hour before serving.
(From: http://www.theworldwidegourmet.com/ recipes/celery-root-celeriac-remoulade/)
Plant Profile: Celeriac
By Nina Berryman
“What is this?” was a common exclamation during last week’s pick up as people laid eyes on celeriac for the first time. Celeriac, also known as celery root, is a little known vegetable closely related to celery. For any of you who have not dared to try it yet, do not judge it by its gnarly appearance, it is actually quite delicious! Celery and celeriac are actually subspecies of the same species, Apium graveolens. Celery has been selectively bred for its stalk whereas celeriac has been selectively bred for its roots. They are members of the Apiaceae family (formerly known as Umbellliferaceae), which also includes dill, carrot, cilantro, parsnips and parsley. This family was previously known as Umbelliferaceae because the flowers grow in umbels, which is the botanical name for flowers that grow in a cluster that is the shape of an umbrella. Think of the wild flower Queen Anne’s Lace, which is also in this family. You will be hard pressed to see the flowers of a celeriac plant though, because they are biennials, meaning they do not flower until their second year. Unless you are interested in seed saving, most farmers will harvest celeriac as soon as it is ready to eat, which is after about 100 days. This is one of our slowest growing crops on the farm. It stores exceptionally well, either in your house after it is picked, or in the ground over the winter. The bulb can be eaten cooked or raw, and the stalks are great for making soup stock.
Source:
Ashworth, Susan, Seed to Seed. Seed Savers Exchange. 2002.
Local Grain
By Nicole Sugerman
Two weekends ago, I traveled to Fernbrook Farm, an organic CSA in New Jersey, with apprentices Megan and Lauren. With Fernbrook’s apprentice, Rob, Lauren has been conducting a small-grains raising experiment this season, and I was excited to tag along for part of the process. They had previously harvested the dry wheat, so we worked on threshing, which is the process of separating the wheat berries from the chaff. While large grain producers have machines that do this work for them, we did it the very, very old fashioned (and labor intensive) way—by beating two-by-fours against the grain on a sheet, until the wheat berries all fell loose from the chaff and cracked open in their hulls. Other techniques for small scale threshing include smashing the grain inside a pillowcase, having an animal or person repeatedly walk on the grain, or putting the grain between two tarps and running over it in your car (!). This last way seemed like it had the potential to go very wrong, so we did not try it.
Next, Lauren and Rob will winnow the grain, or separate it from the pieces of chaff and hulls it now resides with in a five-gallon bucket. On a small scale, this is usually accomplished by running a window fan or catching a breezy day and pouring the wheatberries from one bucket to another—the chaff will be blown away in the breeze, while the heavier berries will fall to the bucket below. After that, they will grind the wheat into flour, a formidable process on its own without a large-scale grain mill. Grains on a small scale are a lot of fun, but also a lot of work.
The idea of local grains has long been seductive to me. The challenges are many- we completely lack a local grain processing infrastructure, and grain is traditionally produced on a scale for which our region lacks the space. Still, I think an urban grain project would be really exciting, and more and more people are catching the ‘local grain’ bug. Daisy Flour, an old Pennsylvania flour company using a grain mill that has been operating since the 1750’s, has recently been reintroduced, producing organic, PA-grown wheat and spelt flours in Lancaster County. The Heritage Wheat Conservancy is researching traditional wheat types grown in New England, growing test crops to try to re-introduce climate-specific, regional wheat varieties. I follow the progress of efforts like these with enthusiasm, but knowing next to nothing about raising grain, have pegged it as a topic for winter reading. I hope to experiment with growing my own small grains in the future, and hope that, someday, we will see the existence of a Philadelphia-based local grain project.
Learn More About Local Grain
Web Resources:
Daisy Flour:
http://daisyflour.com/
Heritage Wheat Conservancy:
http://growseed.org/
Further Reading:
“Flour That Has The Flavor of Home”
The New York Times, September 2008
http://query.nytimes.com/gst/fullpage.html?res=9E04EFD91038F933A2575AC0A96E9C8B63&scp=1&sq=&st=nyt
"Small Scale Grain Raising"
Gene Logsdon
Chelsea Green Publishing
Autumn on the Farm
By Nicole Sugerman
Fall does not officially begin until the Fall Equinox, which will happen on the 22nd of this month. On this day, the Earth tilts neither toward nor away from the Sun, the equator lining up precisely beneath the Sun as we orbit. After the Equinox, our hemisphere will begin to tilt away from the Sun, bringing us colder temperatures and increasingly fewer minutes of sunlight each day, until we reach the shortest day of the year, the Winter Solstice.
While this information is interesting in an astronomical sense, it matters very little to our attitudes on the farm. For me, fall has arrived, and I have been in a fall mindset since the very first day of September. On September 2nd, I cooked a big pot of winter squash stew, ate apple crisp, and thought to myself, “whew. I made it through the summer.” Since then, I stubbornly wear my flannel shirt every day, despite this week’s return to summery temperature highs in the 80’s. The feeling of fall is reinforced by the fact that it is still dark out when we wake up now, and the cooler nights make our beds feel pretty cozy and somewhat hard to leave. The difficulty in wakeing up is one of the few drawbacks to the fall, however. While many see the approach of colder temperatures as a time defined by slight melancholy, fall is an exciting and high-spirit time here on the farm.
Activity-wise, planting has pretty much ended for the season. We seeded our last plantings of beets and carrots two weeks ago, and are poised to plant out our last flats of lettuce and our last fifty feet of radishes this week, ending our outdoor planting for the entire season. Being free from the need to keep up with our planting schedule gives us more time to cultivate our existing crops, getting the weeds under control and making the farm look neater and the plants happier. We are also starting to take finished beds out of production, clearing out the existing plants and sowing our cover crops, mixes of legumes and grasses, which will stabilize the bare soil from erosion, shade out weeds, fix nitrogen, and add organic matter when we till them into the beds in the spring. We use two cover crop combinations on the farm; beds that we will plant into early next spring get a mixture of oats and field peas, both of which will grow now, die during the winter, and leave us with cleared beds when the ground thaws next spring. We will plant the other beds in a mix of winter rye and hairy vetch, which will survive the winter and continue to grow until we cut it down next spring, ready for planting in the late spring or early summer.
Usually, September does not feel quite so decidedly fall-like. Last season, although our cool-weather crops were starting to return (cooking greens, radishes, and look out for the impending return of turnips), our summer crops lasted much longer into the fall. September still meant epic tomato harvests and abundant bell peppers. The strangely cool, wet summer this year means that many of our summer crops are dying earlier than they ideally would. We are about to rip out most of the barely-producing tomato plants, and the summer squash has tapered off dramatically. Not to worry, though; the season has lots of fall favorites in store, like fennel, broccoli, and bok choi, as well as some more unusual choices, like daikon radish and more of the celeriac that you all tried last week. We are in bitter battles with the deer (yup—they just now found our farm after a blissfully deer-free summer) for the edamame, and our determination in fighting harlequin bugs for our broccoli-family crops seems to be paying off.
Battling with harlequin bugs reminds me ofone of the most exciting aspects of fall—school is back in session! We are glad to welcome Saul students back to the farm, where they can pick up where they left off last spring. Working with entire classes of students is a very different experience than the intimacy of working with our five Saul summer interns, but it brings vitality, excitement, and many hard working additional hands to the farm. The 11th grade agroecology students spent a day of class hand-picking harlequin bugs off of the cauliflower, cabbage, and broccoli plants with us last week—so think of them when you eat these crops later this season.
The first few seasons of my farming career, fall was an admittedly sadder time. I felt anxious that, uncertain what I would be doing the next year, it might be my last season on a farm. “This might be the last turnip I will ever harvest,” I would think sentimentally, “or the last time I will pull grass out of the salad mix.” Starting the wind-down of my second season farming in Philadelphia, the fall feels satisfying and exciting with the knowledge that I will keep farming. Now is the time for us to reflect on what is going well this season, with a constant eye on improvement and innovation for next year. We are starting to think of new crops we want to try, new systems we want to implement, and the possibilities for building on what we started this season. The fall is just another stage in a cycle, where we concentrate on soil fertility and long-term management to make the farm more productive and healthy in the seasons ahead.
Book Review! One Man’s Meat by E.B. White
By Nina Berryman
Interested in reading about agriculture, but tired of dense, fact-heavy books like The Omnivore’s Dilemma and Fast Food Nation? While these books are great (and I completely recommend them if you haven’t read them), I have another suggestion for those of you looking for a more entertaining read. One Man’s Meat by E.B. White is a light, but informative book about Mr. White’s trials and tribulations starting a farm on the coast of Maine. The book is a collection of journal excerpts throughout the year. Engaging and witty, White provides philosophical insight into the love and frustration necessary to start a farm, as well as provides commentary on the state of the world in the 1940’s. He reflects upon his decision to move from the city into the country and offers amusing cultural comparisons between urban and rural life.
Interested in reading about agriculture, but tired of dense, fact-heavy books like The Omnivore’s Dilemma and Fast Food Nation? While these books are great (and I completely recommend them if you haven’t read them), I have another suggestion for those of you looking for a more entertaining read. One Man’s Meat by E.B. White is a light, but informative book about Mr. White’s trials and tribulations starting a farm on the coast of Maine. The book is a collection of journal excerpts throughout the year. Engaging and witty, White provides philosophical insight into the love and frustration necessary to start a farm, as well as provides commentary on the state of the world in the 1940’s. He reflects upon his decision to move from the city into the country and offers amusing cultural comparisons between urban and rural life.
Plant Profile: Sage
By Nina Berryman
Salvia officinalis is in the mint family, Lamiaceae. Mint and basil are also in this family. Common characteristics of this family are a square stem and leaves which are opposite from one another. It is originally from the Mediterranean. It got its name from the Latin “salvare” meaning to save, which indicates it has many purposes. There is a Latin saying, “Cur moriatur homo cui Salvia crescit in horto?” which means, “Why should a man die when he has safe in his garden?” Sage is both great for cooking, and for healing. Try eating it on bread with butter. Or in soft cheddar cheese on eggs (see the recipe page). Sage and sea salt can remove tartar and whiten teeth. You can make a mouthwash out of sage, rosemary, peppermint and comfrey. Stuffing a turkey with sage also aids in preventing discomfort from indigestion. Sage leaves in the soil can deter nematodes which are common garden pests. Sage is antibiotic (kills bacteria), antifungal (kills fungus), astringent (constricts body tissues), antispasmodic (suppresses spasms), and a diaphoretic (promotes perspiration). Smudge sticks are commonly made out of dried sage that is wrapped together in a bundle. Burning a smudge stick like incense is supposed to purify a physical space.
Salvia officinalis is in the mint family, Lamiaceae. Mint and basil are also in this family. Common characteristics of this family are a square stem and leaves which are opposite from one another. It is originally from the Mediterranean. It got its name from the Latin “salvare” meaning to save, which indicates it has many purposes. There is a Latin saying, “Cur moriatur homo cui Salvia crescit in horto?” which means, “Why should a man die when he has safe in his garden?” Sage is both great for cooking, and for healing. Try eating it on bread with butter. Or in soft cheddar cheese on eggs (see the recipe page). Sage and sea salt can remove tartar and whiten teeth. You can make a mouthwash out of sage, rosemary, peppermint and comfrey. Stuffing a turkey with sage also aids in preventing discomfort from indigestion. Sage leaves in the soil can deter nematodes which are common garden pests. Sage is antibiotic (kills bacteria), antifungal (kills fungus), astringent (constricts body tissues), antispasmodic (suppresses spasms), and a diaphoretic (promotes perspiration). Smudge sticks are commonly made out of dried sage that is wrapped together in a bundle. Burning a smudge stick like incense is supposed to purify a physical space.
Roasted Bell Peppers with Basil and Balsamic Vinegar
3 red bell peppers
3 yellow bell peppers
4 1/2 tablespoons olive oil
1 1/2 tablespoons balsamic vinegar or red wine vinegar
1 tablespoon matchstick-size orange peel strips (orange part only)
12 large fresh basil leaves
Char bell peppers over gas flame or in broiler until blackened on all sides. Wrap in paper bag and let stand at least 10 minutes. Peel and seed. Rinse if necessary; pat dry. Cut into 3/4-inch-wide strips. Place in bowl. Mix in oil, vinegar and orange peel. Season with salt and pepper. Let stand 1 hour. (Can be prepared 1 day ahead. Cover and refrigerate. Bring to room temperature before serving) Chop basil; mix into peppers and serve.
(Bon Appetit, 1991. www.epicurious.com)
Mashed Potatoes with Celery Root and Mascarpone
3 1/4 pounds potatoes, peeled, cut into 2-inch pieces
1 1/2 pounds celery root (celeriac), peeled, cut into 1/2-inch pieces
3 whole peeled garlic cloves plus 1 tablespoon minced garlic
8 ounces mascarpone cheese, room temperature
1/2 cup (1 stick) butter
Place potatoes, celery root and whole garlic cloves in large pot. Add enough cold water to cover vegetables. Salt the water and bring to boil. Cover partially and boil until vegetables are very tender, about 40 minutes. Drain.
Transfer vegetables to large bowl. Using electric mixer, beat mixture until almost smooth. Add minced garlic, mascarpone and butter; beat until smooth. Season to taste with salt and pepper. (Can be prepared 3 hours ahead. Let stand at room temperature. Rewarm over medium-low heat, stirring frequently.)
(From: Bon Appetit Magazine, 1997. www.epicurious.com)
Open-Face Butter and Radish Sandwiches.
2 1/2 bunches radishes, trimmed
Unsalted butter, room temp.
20 1/4-inch-thick diagonal slices baguette
Maldon sea salt or coarse kosher salt
Place radishes in medium bowl of ice water and chill at least 30 minutes and up to 2 hours. Drain radishes and slice thinly.
Spread butter generously over baguette slices and sprinkle lightly with sea salt or coarse kosher salt. Arrange radish slices atop buttered baguette slices and serve.
(Bon Appetit, 2008)
Eggs Buerre Noir
Eggs
Butter
Sage
Cider vinegar
Fry eggs in a buttered, covered skillet.
Remove when done and place on a platter in a warm (200 degree) oven.
Put a lump of butter for each egg in skillet and cook until brown.
Add ¼ teaspoon cider vinegar for each egg.
Mix and spoon over eggs with finely minced fresh or
dry sage
Why was my Share Smaller Last Week?
This is the nature of a CSA- there are ebbs and flows in the growing season, and these translate into the ebb and flow in the size of your share. It’s what it means to be a shareholder in a farm. Your share is directly linked to production, which is directly linked to the weather and point in the growing season. We are all in this together, sharing both the bounty and the risks of agriculture. You, the community are supporting the farmers, and we the farmers are supporting the community. This season, because of all the rain and cooler than normal weather, a few of our crops are suffering, especially the tomatoes and basil. Other crops, like the bell peppers and summer squash, are slowing down earlier than usual because of the lack of the typical summer heat and sun. But just around the corner is a return of cool weather crops like the ones you saw in the spring, as well as new fall root crops like parsnips and rutabagas.
Where Does The Rest of the Food Produced at Henry Got Crops! Go?
By Nicole Sugerman
Although our primary mission is to serve our community shareholders (that’s you!), not 100% of the produce we grow ends up on your tables. There are several reasons for this. In order to succeed in our first season, we sold CSA shares cautiously, estimating how many shares we could fill based on a worst-case scenario. We didn’t want to sell shares too ambitiously and then not have enough food. So, we picked a number that we knew we could exceed in order to satisfy and impress our first-season community. Luckily, our yields are a bit higher than our worst-case predictions, meaning we have more produce than we need to give you all generous shares each week.
Also, we occasionally have bumper crops of a certain item. No matter how much eggplant we gave out this past July, we were inevitably left with a rather large amount. Ditto with greens in the early spring. Calculating how much of a certain crop to plant is a little bit tricky, since productivity varies based on time of the year, time of planting, and climactic conditions each season. So sometimes, we overestimate (or under, in the case of this summer’s much too rare salad greens) a little bit and end up with a bit too much of something.
When we have surplus of something, we distribute it through other means. Every Wednesday, we operate a small farmstand on Henry Avenue. We wanted to provide a venue for the Saul community to eat the produce they helped to grow even if they did not want the commitment of becoming season-long shareholders. Also, Saul has traditionally sold corn on the road in summers past, so we did not want to disappoint those expecting fresh Saul produce.
We also have a stand at the Manayunk Farmers Market on Main Street every Saturday. This is a new market this year, and we were excited to be able to support a new farmers’ market so near to the farm. Since these two farmstands are on Wednesday and Saturday, we conveniently do not have to harvest especially for them; we can use extras that we harvest for share pickups on
Tuesdays and Fridays.
After we satisfy our shareholders first and our markets second, the farm staff takes home vegetables for our own use. Mostly, we take home the slightly gnarly looking stuff, but everyone can take home as much as they can use; our interns and apprentices receive vegetables as a part of their payment. Also, I think it is important for the entire farm staff to eat the vegetables we grow, both as a measure of quality control (are the radishes woody? Are the winter squash ripe enough?), and so that we can knowledgeably answer questions about taste and preparation of each vegetable.
We also donate food to the North Lights Community Center, which runs a food bank twice a week. We donate food because Nina and I are ideologically committed to helping to make fresh, organically produced vegetables accessible to those who are food insecure. We are also required to donate food as part of our participation in the City Harvest program. Run by the Pennsylvania Horticultural Society, City Harvest is a really exciting, multi-faceted gardening program. Seedlings are grown at a prison in the Northeast, helping prison inmates learn about seedling production and gardening work.
Additional seedlings are grown at a greenhouse shared by Weavers Way Farm, of which our CSA is a part, and PHS, because the participation in the program is so popular that the capacity is now beyond that of the prison greenhouse. These seedlings are distributed throughout the season to community gardens and farms throughout Philadelphia. All of the growers who receive these seedlings donate a portion of their produce to food banks and cupboards. We are proud that the two coordinators of the City Harvest program are shareholders in the Henry Got Crops CSA, as well as a colleague in the Philadelphia Green program at Pennsylvania Horticultural Society. All three are invaluable sources of help to us in our first year!
Established in 1936, North Light Community Center is on Green Lane in Manayunk. In addition to their twice-weekly food cupboard, North Light offers tutoring, summer camp, and afterschool programs for children and teens, technology and job placement programs, neighborhood cultural events, and even grows its own vegetable garden/ entrepreneurial program through the city-wide, recreation-center based Teens For Good program. We are pleased to be working with them this season!
Wednesday, February 17, 2010
What Happened to All the Basil We Were Getting?
By Nina Berryman
Another casualty of the wet summer we have been having: the basil. Okay, “casualty” might be too strong a word...it’s not dead, at least not yet. At first glance the basil still looks fine. But upon closer inspection many of the leaves are starting to yellow. Upon further inspection, there is a white fuzzy layer on the underside of most of the leaves. All signs point to… Basil Downy Mildew!
Just like the late blight, which is affecting our tomatoes, downy mildew thrives in wet, cloudy conditions which have been so common this summer. Basil downy mildew was first reported in the US in October of 2007. It reached the Northeast for the first time last year. It has been reported in various countries in Europe, Africa and Asia over the last 10 years or so. Prior to the turn of the millennium though, it had only been reported in Uganda and that was in 1933.
UV-rays can kill the spores of this fungus, but we haven’t had too many sunny days in the last few months. The spores travel by wind and then get deposited on plants by rain. I found one source that said there are no fungicides that can be used against it, and one source that said there are only a few.
One of the other Weavers Way Farm sites (at the Awbury Arboretum) also has the fungus. It was noticed there about one week before it was noticed at Saul. Late blight on the tomatoes also showed up at the other site about one week before it did at Saul. Perhaps because of our higher elevation, or because our site has fewer trees and more wind, there seems to be about a one week delay in disease outbreaks. The farmers at the other site stopped harvesting basil for a couple of weeks and have reported that it seems to be coming back. We will try the same tactic at Saul and hopefully the basil will bounce back. Keep your fingers crossed! Hopefully you all made some pesto and put it in the freezer already!
Sources:
Cornell University, Cornell Horticulture:
http://www.hort.cornell.edu/department/Facilities/lihrec/vegpath/photos/downymildew_basil.htm
Cornell Univeristy, Vegetable MD On line: http://vegetablemdonline.ppath.cornell.edu/NewsArticles/BasilDowny.html
Jalepeno Poppers
• 12 ounces cream cheese, softened
• 1 (8 ounce) package shredded Cheddar cheese
• 1 tablespoon bacon bits
• 12 ounces jalapeno peppers, seeded and halved
• 1 cup milk
• 1 cup all-purpose flour
• 1 cup dry bread crumbs
• 2 quarts oil for frying
1. In a medium bowl, mix the cream cheese, Cheddar cheese and bacon bits. Spoon this mixture into the jalapeno pepper halves.
2. Put the milk and flour into two separate small bowls. Dip the stuffed jalapenos first into the milk then into the flour, making sure they are well coated with each. Allow the coated jalapenos to dry for about 10 minutes.
3. Dip the jalapenos in milk again and roll them through the breadcrumbs. Allow them to dry, then repeat to ensure the entire surface of the jalapeno is coated.
4. In a medium skillet, heat the oil to 365 degrees F ( 180 degrees C). Deep fry the coated jalapenos 2 to 3 minutes each, until golden brown. Remove and let drain on a paper towel.
Source: www.allrecipes.com
Potato Leek Soup
• 2 lbs. potatoes
• 1 lb. leeks, washed and chopped
• 1 onion, chopped
• 1 celery stalk, chopped
• 1 carrot, chopped
• 5 cups chicken stock or broth
• 1/2 cup milk
• 4 tablespoons butter
• 2 tablespoons chopped flat leaf parsley
• salt and pepper
• 6 tablespoons cream or half-and-half
• 1/2 cup shredded cheddar cheese or chives
Melt the butter over medium heat in a large saucepan. Add the potatoes, leeks, onion, celery, carrot; cover, and cook for 5-7 minutes, stirring frequently.
Add the chicken stock or broth, 1/2 cup milk, salt and pepper. reduce heat to low, cover, and cook until the vegetables are tender and potatoes are soft.
Mash the potatos and vegetables in the pot or transfer to a blender or food processor in batches and process until smooth. make sure the soup has cooled for 15 minutes before putting it into a food processor.
When ready to serve, reheat the soup, serve in bowls and swirl 1 tablespoon half-and-half into each serving. Sprinkle with chives or shredded cheddar cheese.
Serves 6.
Source: www.cooks.com
Machines
By Nina Berryman
“Men have become tools of their tools” is a quote from Henry David Thoreau that often comes to mind while I work with machinery at the farm. Aside from the gender-exclusive language, I find this a valuable quote that is worth pondering. Most often this quote comes into my head as I am muttering under my breath about some frustrating mishap regarding a small-motor machine that’s malfunctioning. While we don’t use machines often at Henry Got Crops, there are a large number of machines that we have access to. I have a love-hate relationship with all of them. The pros and cons of machinery are many and every time I use one of the machines at Saul my mental list of pros vs. cons get a little longer, which only adds to the complication of my love-hate relationship.
In the big picture, my thoughts on machines are fairly straight forward: Machines are polluting to operate and to build. Machines are dangerous. They are loud and can hurt your ear drums. They are powerful and can cause serious injuries. They are fast which reduces the reaction time you have if something goes wrong. Machines do work that we would otherwise do by hand, thus distancing us from the task and reducing our ability to observe the details of what is happening. For example: Is there a toad (which is a beneficial predator) in the bed we are tilling? Are there eggs of an insect pest on the underside of the weed leaves that should be removed instead of tilled under? One person on a machine replaces the work of many people, and I want to engage more people in farming, not less. All of these points make me prefer working by hand rather than working by machine.
However, the ever-growing list of things to do, as well as my limited amount of energy, often obscure these criticisms I have of machinery. Instead, when all the beds for this week’s plantings still need to be tilled, and it’s 10am on a Thursday and we need to start harvesting for Friday’s pick-up, I start seeing the speed and power of a tiller as a welcomed savior to the daunting task before us.
But here is where some of the complications come in: do machines save time in the long run, and do they do a superior job? Say we are standing in front of a bed that needs to be weeded before we plant radishes into it. We can pick up the hoe, or we can start the tiller. With machines, I have quickly learned that with an increased complexity in the machine comes an increased number of things that can go wrong. If the tiller is ready to go, then using the tiller will be faster. But the chances that the tiller is ready to go are slim. It could need new tips on the tines. It could need a different attachment. It could need new oil, or more gas. Given that we share machinery with two other farm sites and an entire high school, keeping track of something simple like when the tank was last filled becomes nearly impossible. Say, for the purpose of this, that everything is ready to go with the tiller. The tiller will turn the weeds back into the earth, whereas weeding by hand will rip them out. In the short term, tilling produces a bed that is ready for planting in a shorter amount of time. But in the long run, which method produces better results? This is the big “experiment” going on at Saul right now. If anyone is interested in volunteering to count grass re-germination rates please contact us!
I have a few lessons learned that I can share after my short experience working with machines. However, like everything else, they are not simple, quick solutions to facilitating the use of machines! First, know which machine is best for the job. Luckily at Saul we do have many machines from which to choose (one benefit of working at a school where they have a small machines class!). However, with many machines to choose from the learning curve is steep, and the time it takes to “master” the use of a new machine in order to determine if it is in fact the right tool for the job is significant. Second, learn basic machine maintenance and repair. This is a big hole in my farming knowledge and one that I plan on filling…once I have enough “free” time to sufficiently tinker. When might this happen in a climate with an 8 month growing season? I’ll add this to my list of
“off season” things to do in January! Third, take advantage of people power when you have it! Fourth, take pre-emptive measures to reduce the “need” for machines in the future. For example, a thick mulch will suppress weeds so that when it’s time to plant a second time in that bed, a tiller is not necessary to rid the bed of weeds. Of course, even this is not as simple of a solution as it sounds. So far, the only mulch we have found to be thick enough to repress the perennial grass at Saul is plastic, which is of course petroleum in another form. Is it less evil than the petroleum in the gas tank of the tiller? If so, is it faster to lay plastic by hand on a bed, or till the weeds that grow if you don’t use plastic? And don’t forget to consider the fact that you can’t reuse plastic as a mulch more than once. The complexity of the decision making process becomes apparent!
Here is a quick run-down of the machines we use at Henry Got Crops and their pros and cons:
Riding Tractor: Pros- very wide and fast. Cons- dangerous and difficult to operate, breaks often and is very complicated to fix.
Toro Dingo (a walk-behind tractor that tills the land): Pros- wide, fast, easy and relatively safe to operate. Cons- cuts up grass roots and mixes them into the ground instead of removing them, hard to maneuver in small areas, such as our five foot wide pathways
BCS Tiller (a walk-behind tiller that tills and shapes beds): Pros- creates raised beds quickly and very well, is small and relatively maneuverable. Cons- exhausting and dangerous to use in rocky soil, difficult to operate if you are short and have small hands, many pieces need to be routinely tightened and replaced.
Brush hog (a four-wheeled weed wacker): Pros- self-propelled, wide, powerful, fast. Cons- dangerous because of its speed and size of blade, hard to operate on uneven terrain.
Mantis (in essence a weed wacker with a head that tills instead of cuts): Pros- gets into small places. Cons- not very powerful
Weed wacker: Pros- gets into small places, very maneuverable. Cons- can’t cut through some of our larger weeds
Walk-behind lawn mower: Pros- cuts low to the ground. Cons- gets jammed easily.
Bruschetta
1 loaf French bread (sliced)
Grill slices lightly on both sides, or broil in oven on baking sheet
2 large yellow tomatoes (diced)
2 large red tomatoes (diced)
½ cup mozzarella cheese, diced
½ cup green olives, chopped
½ cup olive oil
½ cup basil, chopped
2 tablespoons lemon peel, grated
1 tablespoon capers
6 cloves garlic
Salt and pepper to taste
Combine and spoon over grilled bread.
From: Simply in Season
Skillet Greens with Crispy Shallots and Cider Gastrique
1/4 cup sugar
1/2 cup apple cider vinegar
1 teaspoon dried crushed red pepper
2 cups plus 1 tablespoon peanut oil
2 cups thinly sliced shallots
Coarse kosher salt
2 tablespoons bacon drippings
2 pounds greens (such as collards, chard, and kale), stems removed, cut crosswise into 1/2-inch-wide strips
Dissolve sugar in 1 tablespoon water in small saucepan over medium heat. Increase heat; boil without stirring until amber, brushing pan sides with wet pastry brush, about 5 minutes. Add vinegar and crushed pepper (mixture will bubble vigorously). Stir until caramel bits dissolve. Cool.
Pour 2 cups oil into heavy medium saucepan. Attach deep-fry thermometer to side of pan and heat oil to 350°F. Working in batches, fry shallots until golden brown, stirring occasionally, 1 1/2 to 2 minutes per batch. Using slotted spoon, transfer shallots to paper towels. Sprinkle with coarse salt.
Heat drippings with 1 tablespoon peanut oil in large pot over medium-high heat. Add half of greens and sprinkle with coarse salt and pepper; toss until wilted. Add remaining greens; toss to wilt, about 5 minutes. Reduce heat to medium-low, cover, and cook until greens are tender, adding water by 1/4 cupfuls if dry, about 45 minutes. Season with coarse salt and pepper.
Rewarm gastrique. Transfer greens to large shallow bowl. Drizzle some gastrique over and sprinkle shallots over. Serve, passing remaining gastrique.
Ingredient tip: This recipe calls for a few tablespoons of bacon drippings (fat). If you don’t save drippings, fry up a few slices of bacon until you have what you need.
From: Bon Appetit, January 2009
Penne a la Zucca
3 T. extra-virgin olive oil
2 onions, finely chopped
4 cups peeled and chopped winter squash
1 garlic clove
¼ t. crushed red chili pepper
½ t. sea salt
¼ t. ground nutmeg
2 T chopped sage
1 cup water
1 pound penne pasta or gnocchi
1/3 cup grated parmesan cheese
Heat olive oil in skillet over medium flame. Add onions and cook, stirring often, until very translucent. Meanwhile, using food processor fitted with knife blade, pulse raw squash and garlic in two batches until very fine. Add to onions with chili, salt, nutmeg, and the cup of water. Cover and simmer until squash is soft and sauce-like, 10 to 15 minutes. Stir in sage. Cook pasta in boiling water until just tender. Strain, reserving a cup of cooking liquid. Add pasta to hot sauce in pan, stir and cook over high heat, adding cooking liquid if necessary, until pasta is coated. Stir in Parmesan. Serves 4 to 6.
From: Leah Caplan, The Washington Hotel. From Asparagus to Zucchini.
Plant Profile: Echinacea
By Nina Berryman
There are two flowers open to U-pick right now and one of them is Echinacea, also known as Cone Flower. The Latin name is Echinacea purpurea, from the Greek ekhinos, meaning hedgehog or sea urchin. Echinacea is a member of the Asteraceae family.
Pop quiz: Name a common vegetable in your share that is also in this family!
If you said lettuce you are correct!
Lettuce and Echinacea may seem like unlikely relatives, but if you look at the flowers of lettuce, you’ll see some similarities. As you may recall from the paragraph about lettuce (way back in the spring), all plants in the Asteraceae family have composite flowers. Composite means the main “flower” head is actually made up of many, tiny flowers. If you look closely at the Echinacea, you’ll see in that the disc (the center part of the “flower” head) is made up of many little spikes. Each spike is an individual flower, known as a disc flower. The pink “petals” around the disk are actually flowers as well, known as ray flowers. The petals of the ray flower are all fused together and form what looks like one large petal. The Aster family contains the largest number of species in the northern latitudes.
Echinacea is well known for its immune boosting qualities. You can find Echinacea tea in many stores and the back of the box will say something along the lines of helping the immune system fight off a cold. Echinacea is both a preventative and curative medicine. You can build a tolerance to it, so consuming it all the time will reduce its efficacy. Use it for 5-7 days, then rest from using it for 3 days. All parts of the plant are medicinal: the root, the stalk, the leaves, and the flowers. The two easiest ways to make your own Echinacea medicine are teas and tinctures. To make a tea, I suggest harvesting the flower tops and letting them dry in a brown paper bag, in a dark, dry, warm place. When the heads are completely dry crush them up and add to hot water to make tea. To make a tincture, I suggest harvesting approximately 1/3 of the root (but not ours!) scrubbing it clean, chopping it into small pieces (the smaller the better), and drying it in the oven on low. Then put two ounces of Echinacea root in a glass jar full of one pint of pure grain alcohol or brandy (I use vodka). Cap the jar, and place on a window sill in the sun. Shake the jar once or twice a day for one week. Strain and store in a dark place or in a colored glass bottle. Either take a few drops at a time, a few times a day, or drink watered down, one tablespoon tincture to one cup water. If the root digging and cleaning process seems daunting, you can use the stalk, leaves or stem instead and simply dry them in a paper bag, like with the tea.
Preserving Cherry Tomatoes in Vinegar
2 lbs. cherry tomatoes, 6 tarragon leaves, 4 cloves, 6 white peppercorns, 6 coriander seeds, 2 pinches sea salt, 1 quart vinegar, a thin needle, A large canning jar or two.
Wash the tomatoes, without removing the steams, if possible. Dry them carefully with a cloth, and pierce them in two or three spots with a thin needle. Wash and blot dry the tarragon leaves. Put the tomatoes in a large jar, or two small ones, along with the tarragon, cloves, peppercorns, and coriander seeds. Add the salt and pour in the vinegar. Seal the jars airtight and store in a cool, dark, dry place.
Wait approximately six weeks before eating.
Patrick Eude, Le Havre from Preserving Food without Freezing or Canning
Preserving Basil in Vinegar
Ingredients: Basil, Cider vinegar, small jars with lids.
Chop the basil, place in a jar with some good cider vinegar over it. Store the jar in a cool place.
Jacqueline Clossett, Belgium from Preserving Food without Freezing or Canning
Chop the basil, place in a jar with some good cider vinegar over it. Store the jar in a cool place.
Jacqueline Clossett, Belgium from Preserving Food without Freezing or Canning
Tomato Varieties
By Nicole Sugerman
I thought I wouldn’t get to write this article. I thought I would curse our blighted tomatoes by glowing about their exceptional, unique varieties, taunting you shareholders with their glories only to have them all dead by the second or third week. But the tomatoes are holding on. So I think that it’s high time that I told you all about each wonderful variety. As Nina explained in an article about heirlooms about a month ago, all of our tomatoes are very old varieties passed down outside of the realm of commercial production. They have been selected for taste, uniqueness, and beauty—not uniformity, durability, or the ability to last a long time while being shipped, like their commercial counterparts. Heirloom tomatoes are notoriously fussy. They virtually crack on touch, and smush if you look at them too hard. However, they taste so good that they more than make up for their faults. I have been spoiled by heirloom tomatoes to the extent that, not only am I completely uninterested in eating tomatoes out of season, but I am not even interested in eating a non-heirloom tomato in the summertime. It just doesn’t seem like a tomato. So, here are all the tomato varieties we growing this summer:
Brandywine: This is a perpetual favorite. Large, dark pink tomato. Grows on “potato-type” vines, meaning the leaves look more like potato leaves (round lobes) than traditional tomato leaves. Brandywine tomatoes were introduced into current popularity by a Vermonter named Ben Quisenberry in 1982. He claimed to have gotten his seed from a woman named Dorris, who had the seed in her family for over 80 years. Burpee introduced a very similar variety in the 1880s, but no one is sure whether this is the same tomato. It is native to the Brandywine River Valley.
Cherokee Purple- a deep, dark, purple with green shoulders. I think Cherokee Purple is the sweetest tomato. People believe that this tomato traces back 120 years to the Cherokees in the area around Tennessee.
Mule team- Large, classically red tomato. According to the Ohio Historical Center, it has been in production since 1856.
Pineapple- Yellow with red mottling. One of the largest tomatoes we grow. I cannot find any information on its origins, except that it is an American heirloom, and maybe is from Kentucky.
Valencia- Smallish, deep orange tomato. A family heirloom from Maine. Some think it is called ‘Valencia’ because it looks like a Valencia orange, others think it is from Valencia, Spain.
Zapotec Pink Ribbed- Very unusual pink pleated tomato. Mild flavor. Supposedly from the Zapotecs in Oaxaca, Mexico.
Giant Belgium- Very large and pink. I have trouble distinguishing it from the Brandywine. Introduced in the 1930s in Ohio.
Giant Zebra- Green and yellow striped tomato. This tomato is very contentious. Many seed companies and growers categorize it as an heirloom, but it was bred in 1983, whereas many people who think about such things stipulate that ‘heirlooms’ are defined as vegetables bred before the 1940’s, which marked the onset of industrial agriculture with the beginning of World War 2. We used to debate the definition of heirloom with respect to the zebra a fair amount last season. This tomato has a very devoted following.
Paul Robeson- Dusky red with green shoulders. Looks very similar to the Cherokee, but redder and less sweet. This is a Russian heirloom, introduced into the U.S. by a seed saver in Moscow. It’s named for operatic singer Paul Robeson, advocate for equal rights for Blacks, who was apparently very popular in the Soviet Union.
Moonglow- Bright orange fruit. A little larger than Valencia. I cannot find any information on its origin.
Women in Agriculture
By Nicole Sugerman
It feels kind of like the elephant in the room. It’s not that we don’t talk or think about it around here—indeed, we do both, rather frequently. But rarely do we discuss it with others. For some reason, it’s not the kind of subject that is discussed all that openly. Instead, it’s alluded to subtly, in a manner that always confuses me at first until I remember that this is a little unusual.
“You don’t look like a farmer,” people say when I tell them my profession. “What do you mean?” I reply, ever unable to let an issue go, “Oh, I don’t know,” they reply, “You’re just little. You don’t look like you ride a tractor.” It still takes me a minute to put it together (why do you have to be ‘big’ to ride a tractor? Why do you have to ride a tractor all the time to be a farmer? What does it mean to not “look” like someone who does ride a tractor?) Until I realize, oh, they mean because I am a young woman. At this point, I never know quite what to say. “I ride a tractor sometimes,” or, “yep, well, I am.” The subject changes. But I am constantly reminded that to be a female farmer is something a little out-of-the-ordinary. To work at a farm site staffed almost entirely by women, even more so. So I decided to write out my thoughts about some of the intricacies of women in agriculture.
Lately, I hear a lot about female farmers as a “new trend.” According to the 2007 census, one or two out of ten farms is now operated by a woman. However, the ‘trend’ part is hard to track, and seems to me to obscure some history of women who have always been involved in farming. Female farmers have been historically underreported and under-recognized. The U.S. census records only one operator per farm, the deed holder. As the majority of land is officially owned by men, this renders invisible all of the female partners who manage farms with their husbands or families. Globally, between 65 and 75 percent of all food is grown by women, who own only one percent of the world’s land (Making Contact, Nov. 2003). Mainly operating as subsistence growers, this food production is often conceptualized as ‘domestic work’, obscuring recognition of these female farmers worldwide.
For all its limitations, the census has recorded a doubling of farms operated by women between 1978 and 2005, from 100,000 to 250,000 (http://www.feministing.com/archives/003517.html). As the country’s farmers age, a new ‘back to the land’ movement, fueled partly by desires to put personal politics into action as well as an increasing disillusionment with the job market and traditional concepts of careerism, is encouraging a new crop of farmers, many of them women. We new farmers often farm under nontraditional arrangements- co-farmers are often platonic managing partners instead of the heterosexual husband-wife teams of the past- meaning women are more often recognized as farm owners or principle managers.
Additionally, as farmers age, their land is more often being taken over by wives, daughters, or other female family members. As making a living as a farmer becomes ever more difficult, it interestingly becomes women’s work. At a farmer’s market I frequent, one of the farms is a hundred-acre conventional New Jersey farm
that sells corn, tomatoes, squash, and tree fruit. The farm is run by two early middle-aged sisters who recently took over management of the farm from their 80 year old father. I was excited to see a conventional farm run by women (organic farms have a higher percentage of female owners), so I asked them their thoughts. “Most of the time, other farmers treat us okay,” they told me, “although if we do something wrong, it’s, ‘oh those girls.’ We bring along [our brother] to market sometimes; he doesn’t know anything about farming, but people just want to talk to ‘the man in charge’.” They took over the farm, they told me, because their husbands and brothers had to get “better” jobs that brought in more money. Without the expectation of being primary breadwinners, they were left as the ones who could keep the family farm alive.
In both conversation and personal thought about females and farming, I want to be careful to avoid gender essentialism. I do not want to make generalizations like, “women make good farmers because they like to nurture the earth,” or, “men are better with machines.” Gender expression, I believe, is a complex combination of socialization, culture, and genetics. Not being able to divorce these things from each other, I find it frustrating and counterproductive to base ideas or logic on what men or women are “naturally” like or good at doing. That said, I acknowledge my shortcomings, like a lack of confidence with machines and power tools. Part of this is completely personal, gender aside; I, Nicole, happen to not be good with power tools, whereas I know many other women who are. However, there is a gendered aspect to power-tool-confidence. My sister recently visited me in Philadelphia, and came to work with me on the farm. When I asked her what she wanted to work on, she replied, “anything with power tools,” explaining that she recently volunteered recycling old doors for a green-deconstruction non-profit with a male friend of hers. When the staff person trained them, he offered a power drill to help, but spoke about it and handed it only to my sister’s male friend. Finally, the friend asked my sister if she, too, would like to use the power drill. My sister did, and had a great time. My insecurity with machines and tools has several layers. I am not good at them, I suspect, because I was never encouraged to use them, so I never gained comfort through practice. Now, I am afraid to practice because I am not good, and I do not want other people to notice and use their observations of my fumbling to further whatever ingrained ideas they have of women being bad with power tools. It gets rather angsty. I do not want to speak for all female-bodied farmers, but I think many of us feel like we have something to prove. I have to remind myself sometimes that just because I can’t shovel compost as fast or carry a wheelbarrow quite as full of watermelons, doesn’t mean that I am not strong or not a good farmer. We work together. And anyway, we all can handle wheelbarrows that are pretty darn full.
We did not intentionally create a female dominated farm here at Henry Got Crops. Most of our applicants for internships and apprentices just happened to be female, and most of those qualified ended up being women. This summer, we have had three female apprentices, two female interns, and one male intern (we now have second—a big welcome to Ed, who is newly working with us this fall!) I am glad, though, to be able to offer a positive view of women as strong, hard, workers to the students here at Saul; I want the female students to know that they can be farmers if they want, or anything else they aspire toward. One of our Saul summer interns brought her boyfriend out to work with her one morning. “How did he like it?” I asked her the next day. “I brought him out so he would see how hard I work,” she replied. “He said it was fun, but really hard. He said he couldn’t do this every day.” I have to admit, I was pretty proud.
Plant Profile: Tomatillos
By Nina Berryman
We are lucky this week to have tomatillos in our share, even though we ourselves did not plant them. They were grown by Weavers Way staff along with children who live at the Stenton Family Manor in Germantown. These fruits are not very common in the US, but very prevalent in Mexico. Physalis ixocarpa are in the Solanaceae family and are related to the tomato. They look like green tomatoes, surrounded by a papery husk. When the fruit gets so large it breaks open the husk, you know it is ready to pick. They are very similar to ground cherries, both botanically and in appearance. They are also very closely related to Chinese Lanterns, which are often planted for decoration, although they too are edible. Another name for tomatillos is “Mexican husk tomato.” They come in both green and purple varieties. To store them, leave the husks on, and put them in a cool place, like the refrigerator. Don’t place them in a plastic bag, let them breathe. Generally, they are very easy to grow and quite prolific. If you plant them one year, you will inevitably have tomatillo volunteers next year as they are excellent self-seeders.
Sources: Seed to Seed, Suzanne Ashworth
Hot Peppers We Grow
By Nicole Sugerman
We grow several different varieties of hot peppers on the farm. I like hot peppers because they are beautiful and usually very easy to grow. Hot peppers contain a resin-like compound called capsaicin which is responsible for their spice. The capsaicin is concentrated in the membranes around the seeds, so taking the seeds out of a hot pepper will reduce (but not eliminate) the pepper’s spice. When handling hot peppers, be careful not to touch your nose and eyes, because this will sting! Some people even harvest hot peppers with gloves on to avoid irritation. I have never had a problem harvesting hot peppers, but my hands burned for an entire day once when I made a big batch of jalepeno poppers.
The ‘spiciness’ of peppers is measure by the Scoville Scale, so named for its inventor, Wilbur Scoville, who devised the system in 1912. The Scoville scale measures the amount of capsaicin present in a type of pepper. The hottest pepper on the Scoville scale is reputed to be an Indian hot pepper called the Bhut Jolokia. We attempted to grow this pepper, but it did not germinate. To be honest, I am a little relieved.
Hot peppers have many traditional health benefits. Some people think they cool you down in the summertime by inducing sweating. Medicinally, hot peppers are used to help stimulate blood flow, treat psoriasis, neuralgia, pain, and headache, and as a disinfectant. Mixed with lemon juice, hot pepper makes an effective gargle for sore throats. A tincture (made by soaking an herb in alcohol) of hot peppers is thought to help arthritis.
In descending order of hotness, these are the varieties of hot peppers you might see in your share:
Fish Pepper-
This is the hottest pepper we have right now (habaneros are hotter, but not yet ripe). An heirloom pepper from the Philadelphia region that dates to pre-1947, the fish pepper has been traditionally used to cook fish and shellfish. Grows on beautiful plants with green and white striped leaves. The pepper is short and triangular, with a matte finish, and is white, green and white, or red.
Cayenne pepper-
One of the most common hot peppers. Forms the basis of the powdered cayenne pepper as well as red pepper flakes. It is a long, thin, red pepper that curls slightly.
Poblano pepper-
I am putting the poblano here in the list because, even though poblanos are thought to be mild hot peppers far less hot than jalepenos, our poblanos are always more spicy than our jalepenos. Poblano peppers are native to Mexico, and are used commonly in Mexican cuisine. When dried, they are known as ancho chile. They are dark, dark, green, larger than any of our other hot peppers, and have a bowl-shape around their stems.
Jalepeno pepper-
Also native to Mexico. Very common. Ours are very, very mild. Dark green, ovular, with blunt tip.
Hungarian Hot Wax pepper-
An heirloom pepper from Hungary. Virtually impossible to distinguish from the banana pepper, except by taste. Light green, long, with a tapered point.
Basil, Roasted Peppers and Montery Jack Corn Bread
• 1/2 cup unsalted butter, chilled and cubed
• 1 cup chopped onion
• 1 3/4 cups cornmeal
• 1 1/4 cups all-purpose flour
• 1/4 cup white sugar
• 1 tablespoon baking powder
• 1 1/2 teaspoons salt
• 1/2 teaspoon baking soda
• 1 1/2 cups buttermilk
• 3 eggs
• 1 1/2 cups shredded pepperjack cheese
• 1 1/3 cups corn kernels
• 2 ounces roasted marinated red bell peppers, drained and chopped
• 1/2 cup chopped fresh basil
Preheat oven to 400 degrees F (205 degrees C). Butter a 9x9x2 inch baking pan.
Melt 1 tablespoon butter in medium nonstick skillet over medium-low heat. Add onion and saute until tender, about 10 minutes. Cool.
Mix cornmeal with the flour, baking powder, sugar, salt, and baking soda in large bowl. Add 7 tablespoons butter and rub with fingertips until mixture resembles coarse meal.
Whisk buttermilk and eggs in medium bowl to blend. Add buttermilk mixture to dry ingredients and stir until blended. Mix in cheese, corn, red peppers, basil, and onion. Transfer to prepared pan.
Bake cornbread until golden and tester inserted comes out clean, about 45 minutes. Cool 20 minutes in pan. Cut cornbread into squares.
Eggplant Sandwiches
Submitted by shareholder Beige Berryman
Having tried it many times, I can vouch for the deliciousness and simplicity of this dish! -Nina
• 1 1/2 cups chopped seeded tomatoes
• 1/4 cup chopped fresh basil
• 2 teaspoons red wine vinegar
• 1 large eggplant, cut lengthwise into 1/2-inch-thick slices
• Olive oil
• 6 large 1/2-inch-thick slices country-style French bread
• 9 ounces soft mild goat cheese (such as Montrachet)
Combine chopped tomatoes, chopped fresh basil and red wine vinegar in small bowl. Season mixture to taste with salt and pepper. Set aside.
Prepare barbecue (medium-high heat) or preheat broiler. Brush 6 largest eggplant slices lightly with olive oil (reserve remaining eggplant for another use.) Brush bread lightly with olive oil. Grill eggplant and bread until golden, about 4 minutes per side for eggplant and 2 minutes per side for bread. Arrange bread slices on plates. Spread goat cheese over, dividing evenly. Top with eggplant slices. Season with salt and pepper. Using slotted spoon, mound tomato mixture on eggplant, spread to cover and serve.
www.epicurious.com
Salsa Verde
Ingredients
• 1 1/2 lb tomatillos
• 1/2 cup chopped white onion
• 1/2 cup cilantro leaves
• 1 Tbsp fresh lime juice
• 1/4 teaspoon sugar
• 2 Jalapeño peppers OR 2 serrano peppers, stemmed, seeded and chopped
• Salt to taste
Method
1. Remove papery husks from tomatillos and rinse well.
2a. Roasting method: Cut in half and place cut side down on a foil-lined baking sheet. Place under a broiler for about 5-7 minutes to lightly blacken the skin.
2b. Boiling method Place tomatillos in a saucepan, cover with water. Bring to a boil and simmer for 5 minutes. Remove tomatillos with a slotted spoon.
3. Place tomatillos, lime juice, onions, cilantro, chili peppers, sugar in a food processor (or blender) and pulse until all ingredients are finely chopped and mixed.
Season to taste with salt. Cool in refrigerator.
Serve with chips or as a salsa accompaniment to Mexican dishes.
Makes 3 cups.
Weeds
By Nina Berryman
In Nicole’s last article she mentioned the difficulty of staying on top of weeds, especially in August. Ms. McAtamney, the AgroEcology teacher at Saul, stopped by the farm today and said, “your article made it sound like it was terrible down here, but everything looks fine!” In co-managing a farm for the first time this year, I am realizing that you are always your own harshest critic. I’ll walk around the farm and feel a wave of anxiety come over me as I see a lawn of grass where there should be cultivated soil, or when I watch a dusting of spiny amaranth seed float away in the wind. Then I’ll stop by one of the other Weavers Way farms and glance over the beds without a critical eye and see nothing but beautiful, orderly rows of vegetables. However, in recent conversations with my coworkers, we have laughed and comforted ourselves in the fact that every farm any of us have ever worked at has had to look for their onions beneath a field of weeds. We told ourselves that we should give ourselves a break when anxiety levels rise as we look at our own field of grass where our leeks are supposed to be thriving.
Every farmer’s approach towards weeds is different. Some people are perfectionists and spend all their time pulling every last weed. Others embrace what nature has to offer and welcome weeds as an unplanned source of food, a key to soil nutrient imbalances, or even a ground cover that they didn’t have to put down themselves. Generally speaking, a weed is any plant you don’t desire in your garden or farm. Simply learning more about a specific weed, such as its edibility for instance, can change your perspective on its desirability and perhaps even promote it out of anxiety-causing weed status. Here are a few common “weeds” that are actually quite tasty and nutritious:
• Purslane (Portulace oleracea)- great eaten fresh in salads, has a watery, slightly citrus flavor
• Lamb’s quarters (Chenopodium album) -similar to spinach, eat raw or cook lightly
• Chickweed (Stellaria media)- a mild, refreshing taste, eaten raw, crush the fresh leaves to help heal a skin irritation or insect bite
• Wood Sorrel (Oxalis species)- citrus tasting leaves, eat fresh
• Dandelion (Taraxacum officinale)- eat the leaves fresh, has a bitter taste
It’s no wonder weeds occupy so much of a farmer’s time and concern: one cubic foot of soil can contain as many as 7,000 viable seeds! With such numbers, it seems wise to capitalize on their multiple functions, if possible. In addition to serving as a source of food, some weed varieties can serve as a type of living mulch. A living mulch is a mulch that is growing in the ground underneath the crops. Clover is often used as a living mulch. Chickweed is one of the best living mulches I have ever worked used. Of course, it is no simple task to get chickweed to grow in the places you want it to and not in the places you don’t!
Weeds reproduce in two ways- either by division or by seed. You might be familiar with the term “division” in reference to dividing a perennial flower. The same concept applies- you take the roots, you break them apart, now you have more plants! This is unfortunately what happens when we are weeding grass with long rhizomes (a type of root). It is nearly impossible to remove the entire root structure and we inevitably leave some in the bed which will then re-sprout in a few days. Reproduction by seed happens when a dandelion goes to seed and releases its white dander into the wind. These seeds can land in the soil and either sprout right away, or become buried and remain dormant in the soil for years and years. Cultivating the soil brings many of these dormant seeds to the surface, exposing them to light and causing them to germinate. Because of this process weeds are known as the primary succession of vegetative growth after a disturbance. Herein lies on of the main arguments for not tilling the land, a method called no-till farming.
For those of you who are interested in neither embracing the weeds and letting them grow, nor weeding by hand for fear of leaving roots in the ground, nor cultivating the soil for fear of encouraging the germination of weed seed, there is another option- smothering! This the traditional mulching technique of layering a thick layer of leaves, wood chips, cardboard or anything else to suppress the weeds. The word “mulch” comes from the German word meaning “soft,” however not all mulches need to be soft. Small pebbles are a popular much in landscaping. We are experimenting with using burlap coffee bags in one of our pathways. Some people do a combination approach of pulling out weeds by hand and then laying them back on the bed to act as a mulch. This approach only really works if you have weeds that do not re-root easily.
At Henry Got Crops! we use primarily the “pull out as much as you can as fast as you can” method. 99% of our weeds are perennial grass. This is because up until this spring that whole area was maintained as lawn. I think I am not alone in saying that perennial grasses are one of the worst weeds! Their root systems are extremely extensive, aggressive and resilient. Plus, they also produce seeds rather quickly, so we are combating them both from above and below! If we had more mulch supplies, such as leaves or cardboard or burlap bags I would like to do much more mulching at the farm as opposed to the hand-weeding and tilling we primarily do. I would also like to experiment more with living mulches, although I would probably seed clover instead of waiting for chickweed to pop up in the right places! We experimented with seeding clover as a living mulch in one bed of broccoli this year. However it didn’t germinate well (perhaps not enough sun) and soon the grass took over.
If any of you have weeding techniques or stories to share, we’d love to hear them!
Sources:
Coleman, Elliot. The New Organic Grower. Camden East, ON. Old Bridge Press, 1989
Storl, Wolf D. Culture and Horticulture. Wyoming, RI: Biodynamic Literature, 1979.
Dawson, Adele. Herbs, Partners in Life. Healing Arts Press, Rochester, Vermont. 2000.
Newcomb, Lawrence. Newcomb’s Wildflower Guide. Little, Brown and Company, New York. 1977.
Eggplant Caponata
1 ½ pound eggplant, cut into ¾ inch cubes
2/3 cup olive oil, divided
Salt and pepper
3 cups diced onions
1 ½ pounds plum tomatoes, seeded and chopped
1 cup green olives, pitted and chopped
3 tablespoons capers
1 cup thinly sliced celery
1/3 cup red wine vinegar
2 teaspoons sugar
Heat oven to 500 degrees. Toss eggplant cubes with 1/3 cup olive oil, season with salt and pepper. Spread in a single layer on a large baking tray and roast for 10 minutes. Continue roasting until eggplant browns, another 10-15 minutes, stirring every few minutes. Heat remaining oil in large skillet and sauté onions for 10 minutes. Add tomatoes, olives, and capers. Reduce heat to a simmer, cover, and cook for 15 minutes. Add eggplant and celery to pan and continue cooking, covered, for about 8 minutes. Remove cover, turn heat to high, and stir in vinegar and sugar. Cook until vinegar evaporates and all flavors meld, about three more minutes. Season to taste with salt and pepper. Serve hot and cold, as a dip, spread, pasta sauce, etc. Makes 8 servings.
From: Christine Mulvey, From Asparagus to Zucchini by the Madison Area Community Supported Agriculture Coalition
Panzanella
Croutons:
1 loaf French bread, torn by hand into bite-size chunks
1 cup extra-virgin olive oil
Salt to taste
Salad:
3 pounds heirloom tomatoes, roughly chopped
1 small red onion, thinly sliced
1 cucumber, peeled, seeded, and roughly chopped
1 cup fresh basil leaves, torn by hand into pieces
Salt and freshly ground black pepper
¼ cup balsamic vinegar
1 cup extra virgin olive oil
To prepare croutons:
Heat oven to 350 degrees. Toss bread chunks with olive oil, and season with salt. Spread on baking sheet, bake until golden, about 10-15 minutes. Let cool.
To prepare salad:
Place tomatoes and their juices in a large bowl. Toss with all remaining vegetables and cooled croutons. Season salad with salt and pepper to taste, then add balsamic vinegar and olive oil.
Serves: 6 large portions, up to 12 side-salads.
From: Patrick O’Halloran, From Asparagus to Zucchini by the Madison Area Community Supported Agriculture Coalition
Corn Fritters with Salsa
For salsa
-2 plum tomatoes, coarsely chopped
-1/3 cup chopped white onion
-2 tablespoons chopped fresh cilantro
-1 to 2 tablespoons chopped pickled jalapeño chiles
-1 tablespoon fresh lime juice
For fritters
-2 ears corn, shucked
-1 large egg
-1/2 cup milk
-1/3 cup yellow cornmeal
-2 1/2 tablespoons all-purpose flour
-1/4 teaspoon salt
-2 to 3 tablespoons vegetable oil
Accompaniment: sour cream
Make salsa:
Stir together all salsa ingredients and season with salt.
Make fritters:
Cut corn kernels from ears and scrape cobs to extract juice, then discard cobs. Whisk together egg and milk until smooth and stir in cornmeal, flour, and salt. Stir in corn, including juice.
Heat 1 tablespoon oil in a 12-inch nonstick skillet over moderate heat until hot but not smoking, then drop in 2 tablespoons batter each for 4 fritters. Fry until lightly browned, about 2 minutes per side, and drain on paper towels. Make more fritters in same manner, adding oil as necessary.
Serve fritters with salsa.
From: Gourmet Magazine, 2000. Epicurious.com
Grilled Herb Potatoes
Ingredients:
• 2 pounds large Yukon Gold or other yellow-fleshed potatoes
• 1/4 cup chopped mixed herbs such as parsley, chives, rosemary, and oregano
• 2 garlic cloves, smashed
• 1/3 cup extra-virgin olive oil
• 1 lemon wedge plus additional for serving
To Prepare:
• Prepare a gas grill for direct-heat cooking over medium-high heat; Cut potatoes into 1/2-inch-thick slices and cook in a large pot of well-salted boiling water 10 minutes (potatoes will not be cooked through).
• Meanwhile, stir together herbs, garlic, oil, 1/2 teaspoon salt, and 1/4 teaspoon pepper in a large shallow dish.
• Drain potatoes well and transfer to herb oil, tossing gently to coat.
• Transfer potatoes to grill, letting excess oil drip into dish (reserve oil in dish). Grill potatoes, covered, turning once or twice, until tender, about 5 minutes total. Return potatoes to dish and toss again with herb oil. Squeeze lemon wedge over potatoes. Season with salt and serve with additional lemon wedges.
• Cooks' note: Potatoes can be cooked in a hot grill pan 10 to 12 minutes.
From: Maggie Ruggiero Gourmet Magazine 2009. Epicurious.com
Vegetable Facts

This graphic was created by Amanda Bonacci, one of our Saul High School summer interns. Amanda will be in 12th grade next year.
Stuffed Zucchini or Summer Squash
Select 5 medium squash. Cut in half crosswise, and hollow out. Chop 1 medium onion. Saute in 2 Tb. olive oil until soft. Remove pan from heat and add ½ c. raw white rice, 2 Tb. chopped straight leaf parsley, 1 ½ Tb. chopped fresh dill, ¼ c. dried currants, and 2 Tb. squash corings, chopped finely. Also add salt and pepper to taste, and ¼ c. pignoli nuts. Make a “broth” by mixing 1 t. tamari with 1 c. water, and moisten the uncooked rice with a few tablespoons of this. Stuff zucchini with rice mixture. Place in pan and add “broth” to ½” deep in pan. Cover with foil and bake at 400 degrees Fahrenheit for ½ hour. Serve with plain yogurt on top.
From: The Political Palate by the Bloodroot collective.
From: The Political Palate by the Bloodroot collective.
A Perspective on Late Blight
By Nicole Sugerman
Not fixating on late blight is difficult for me this season. As a young farmer riding an upward-trending high of local food enthusiasm and growing popular support, the late blight is a hard reality check. No matter how strong the local foods movement, chemical-free farming is risky work. Seasoned farmers, while struck by the severity of the late blight this season, have seen widespread blights and diseases before. For me and my young-farmer peers, this is our first. Sure, I have lost crops each season I have farmed, to insects, to diseases, to fungi. But this is far scarier, and while I have always known that farming is unpredictable and risky, this really proves it, rather unpleasantly.
Late blight travels fast and does devastating damage. Everyone can, and is, getting it, regardless of the health of our plants or the alertness of our watch for it. I keep fighting urges to whine unproductive accusations of unfairness at the natural forces that made this late blight possible; why did the blight have to be on tomatoes, the single most popular and highest grossing crop for so many small farms?
The story of late blight, though, is not just a story of “natural disasters happen to organic farmers.” Like most ‘natural’ events in the 21st century, this one was shaped and constructed in fascinating ways by human-made systems and set-ups.
Late blight usually does not get the chance to thrive quite so favorably. In the North, it is killed by cold winters, and in the South, the summers are too hot and dry to allow its spread. The story of 2009’s Late Blight is a story of large-scale agriculture; the blight was mainly introduced through transplants that were grown in the South, where the blight lived over the winter in warm greenhouses, then infected plants that were shipped and sold through Loews, Home Depot, K-Mart, and Wal-marts in the northeast. Only by raising transplants on a very large, centralized, scale could the late blight infect so many transplants at once, and only through an agriculture that has normalized the practice of shipping these transplants hundreds of miles could they have then been dispersed to so many different areas much farther North, therefore spreading quickly and efficiently.
The Late Blight tale is also one of large corporate chains versus small, local, nurseries and shops. Corporations’ critics have long noted that high turnover rates, low pay, and little skill-training often results in chain store staffs who have considerably less in-depth subject knowledge than the staffs of the stores’ independently owned counterparts. In a local nursery, plants with late blight would have been quickly identified and destroyed. In a Wal-mart or a Home depot, however, the breadth of products sold is so wide that many of the stores have no collective staff knowledge of plant pathology. Because more and more of the items we buy come from the same few chain stores, stores that often foster low worker wages and high worker turnover, specialized knowledge of many of the goods we purchase is lost. Thus, the late-blighted transplants were sent out to gardeners unnoticed, where the spores proliferated and infected more plants.
The last stage is the only ‘natural’ stage of the late blight saga. The summer of 2009 has been unusually cool and wet, creating a perfect climate for the Late Blight to flourish. This confluence of factors has led to an unfortunately damaging situation for vegetable growers. So far, we are successfully keeping our tomato plants alive by spraying with an organic-approved copper hydroxide fungicide. I hear differing accounts of the long term efficacy of copper sprays, so the best we can do is keep our fingers crossed.
The feeling I most associate with my thoughts of late blight is an overwhelming thankfulness to all of you for agreeing to support the “Henry Got Crops!” Farm in a way that is uncoupled to direct crop sales; while I hate the possibility of disappointing you, the shareholders, with a lessened yield of tomatoes this season, it would be far worse to go out of business in our first year of operation, as we might have if we were relying on strong tomato sales to carry us. And the best news is that for now, there are still plenty of big, juicy, heirloom tomatoes to go around.
Further perspectives on Late Blight:
Dan Barber, New York Times Op-ed. “You Say Tomato, I say Agricultural Disaster”
http://www.nytimes.com/2009/08/09/opinion/09barber.html?pagewanted=1
MK Wyle, Civileats Blog. “Tomato Disappointment”
http://civileats.com/2009/07/28/battling-late-blight-in-the-north-east/
Reflections from August
August 10th, 2009
By Nicole Sugerman
When it’s my week to “bottom-line” writing the newsletter (Nina and I take turns), I usually like to write the most substantial article first. Usually, I sit down at my computer and free-write about whatever has been on my mind in the last couple weeks. Today, I sat down and stared at my computer rather blankly for close to half an hour. “That’s funny,” I thought to myself, “is there really nothing on my mind at all?” And then I realized, of course not. It’s August.
Perhaps I am being just a bit dramatic. Of course I still think in August. But I definitely think less. As a couple of us farmers were discussing over lunch today, August is the hardest month for many of us. August tests my determination, my tolerance for monotony, and my ability to keep the big picture in mind. In August, farming’s romanticism wears thin, revealing underneath dripping sweat, and endless, endless, harvests.
I think that’s really what precipitates the August lows. The harvests just keep getting bigger and bigger. Of course this is an exciting, glorious thing—to harvest vegetables is why one farms, really—but the harvests grow to an overwhelming extent. The farm’s fecundity becomes almost unmanageable. Harvest times creep earlier into our mornings and later into our afternoons, until we have maybe two or three portions of time in each week to devote to the entirety of the other farm tasks. It’s not that harvesting is an unpleasant task. Harvesting is actually really fun. Collecting and preparing the products of our labor is deeply satisfying, and big harvests are what we live for; if the harvests were not big, something would be very wrong. However, the harvest also becomes amazingly repetitive. I crave the chance to do another task—“how nice it would be to prepare the bed over there for planting,” I think, “or to weed those carrots, or those beets, or those leeks, or those rutabagas, or that chard. . .”
The entire farm, as a matter of fact, starts to have a little bit of a weed problem in August. There is this aspirational myth in organic farming of the “weed-free” organic farm. The weed-free farm is supposedly possible through the diligent, on-the-ball removal of every weed on a farm before a single one drops its seed back into the fields. If this regimen is (heroically) maintained over a long enough time, a farmer can exhaust the bank of weed seed in the soil, and effectively eliminate weeds on the farm. My farmer friends and I admiringly cite names of farmers reputed to have attained weedless status. I have yet to see such a farm, but I stubbornly hold onto the possibility of its existence. That is, until August comes each year. In August, the possibility of our farm ever attaining anything close to a weedless state is dashed, as weeds flower and spread their seeds liberally throughout the entire farm. I watch the three-foot spiny amaranth drop seed in the peppers as the perennial grasses contaminate the blackberry beds. “No time to deal with that now,” I think wistfully, “I have to harvest 200 pounds of tomatoes.” And 140 ears of corn. And all of the potatoes. It really does not stop.
Our ability to push through August, though, proves humans’ resilience and endurance, as well as farmers’ deep love for what we do. I really do think less, and let my stamina take over, carrying me through the late summer by the sheer will to farm and the mutual support of the crew. Last year, Nina and I would take turns listing off what we were thankful for and what we loved about our jobs when we felt the mid-season lows. We try to keep morale high, by taking a slightly longer lunch break, or letting one crew member get ice cream sandwiches for all. We start daydreaming about what we will do this winter.
My most successful tactic for pushing on through August is keeping the macro-picture close in my mind. Even though it seems to me like I am just picking and washing plants most of the day, I remind myself that what I am also doing is building community, fostering local self-sufficiency, and taking power from globally destructive industrialized food systems toward the creation of creative, empowering, alternatives. Plus, I get to be outside for twelve hours each day. How can I really complain? And sooner than I think, I’ll be brushing snow from the turnips as I harvest, and I’ll think excitedly toward next spring.
Subscribe to:
Posts (Atom)